
In DaVinci Resolve, inserting gaps into your timeline is a simple but useful editing technique. Whether you need to create space for additional clips, adjust timing, or sync audio and video, knowing how to quickly insert a gap can speed up your workflow.
To insert a gap at your current playhead position:
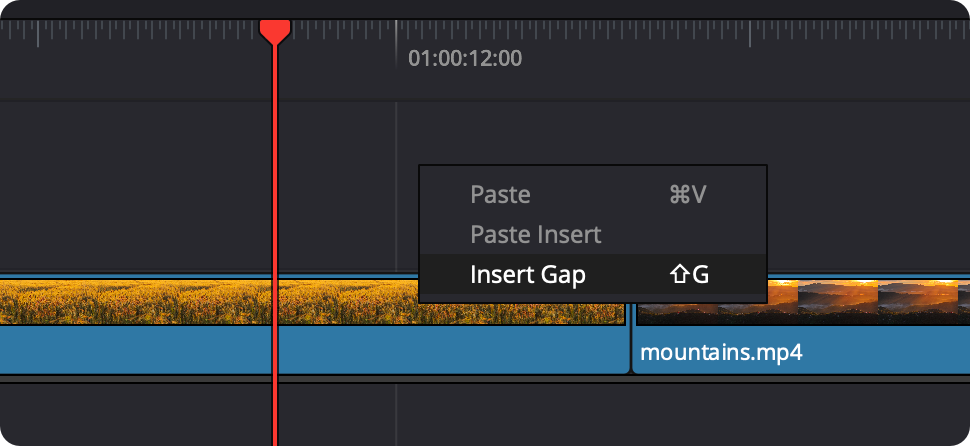
Resolve will insert a gap at the playhead, pushing clips forward on the affected track.
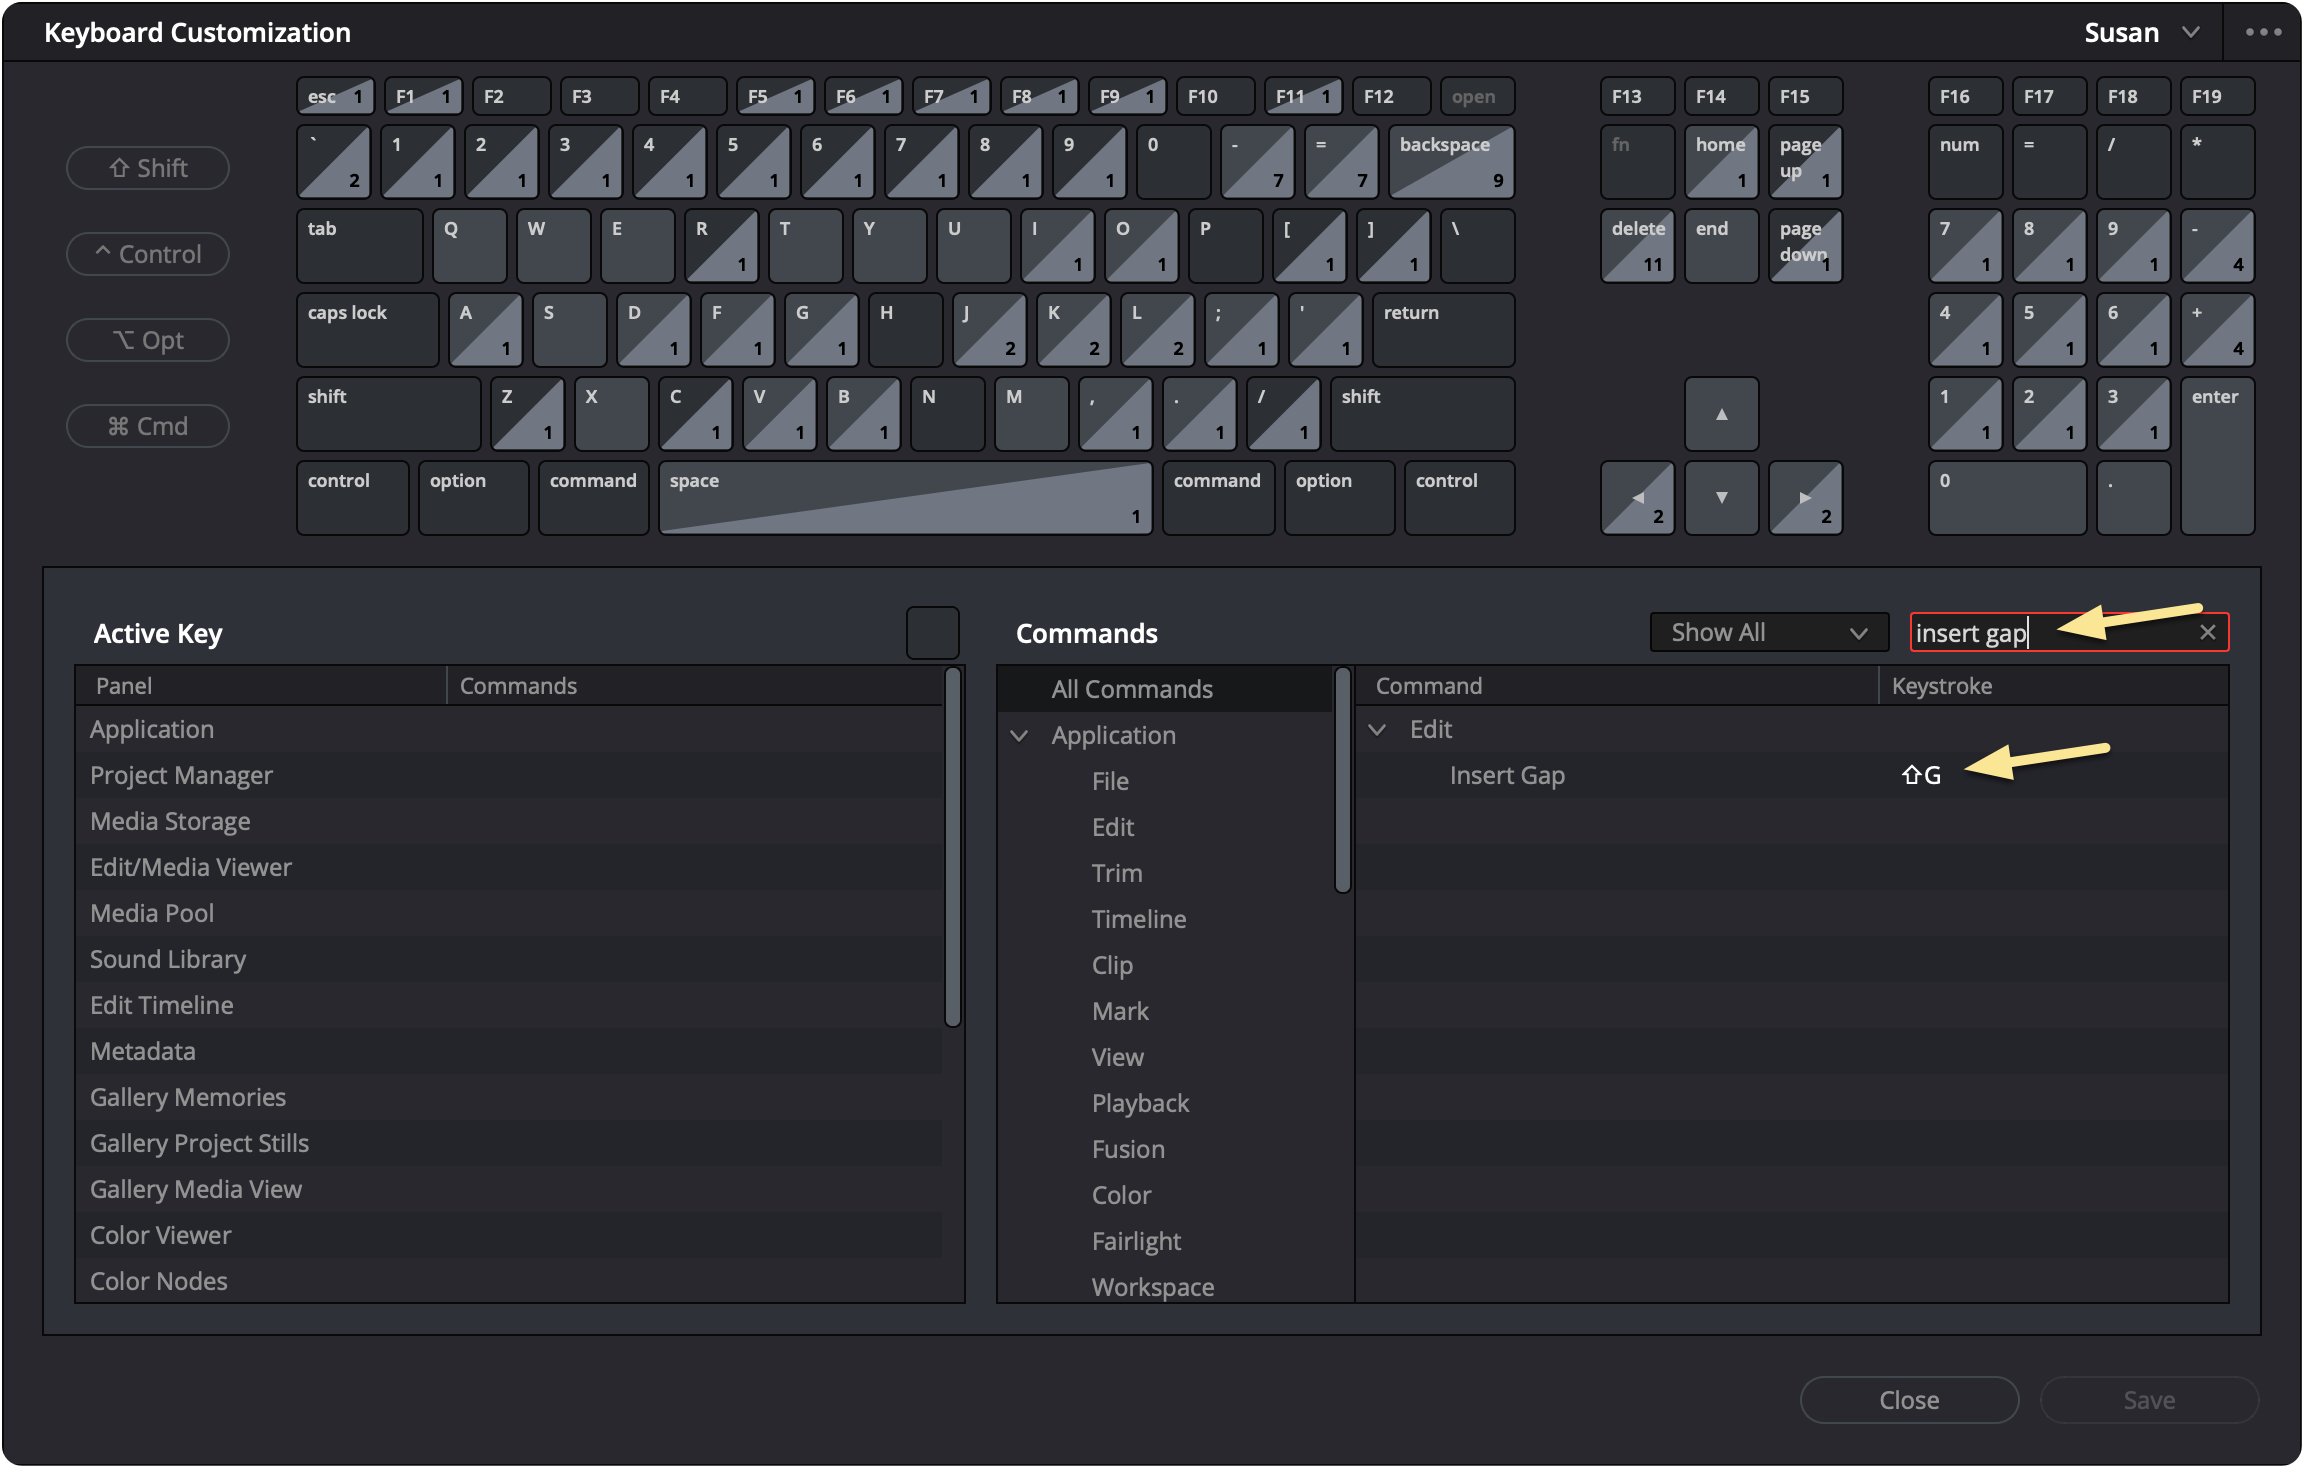
If you find yourself using this feature often, setting a keyboard shortcut can make the process faster.
Once configured, you can insert a gap instantly using your shortcut.
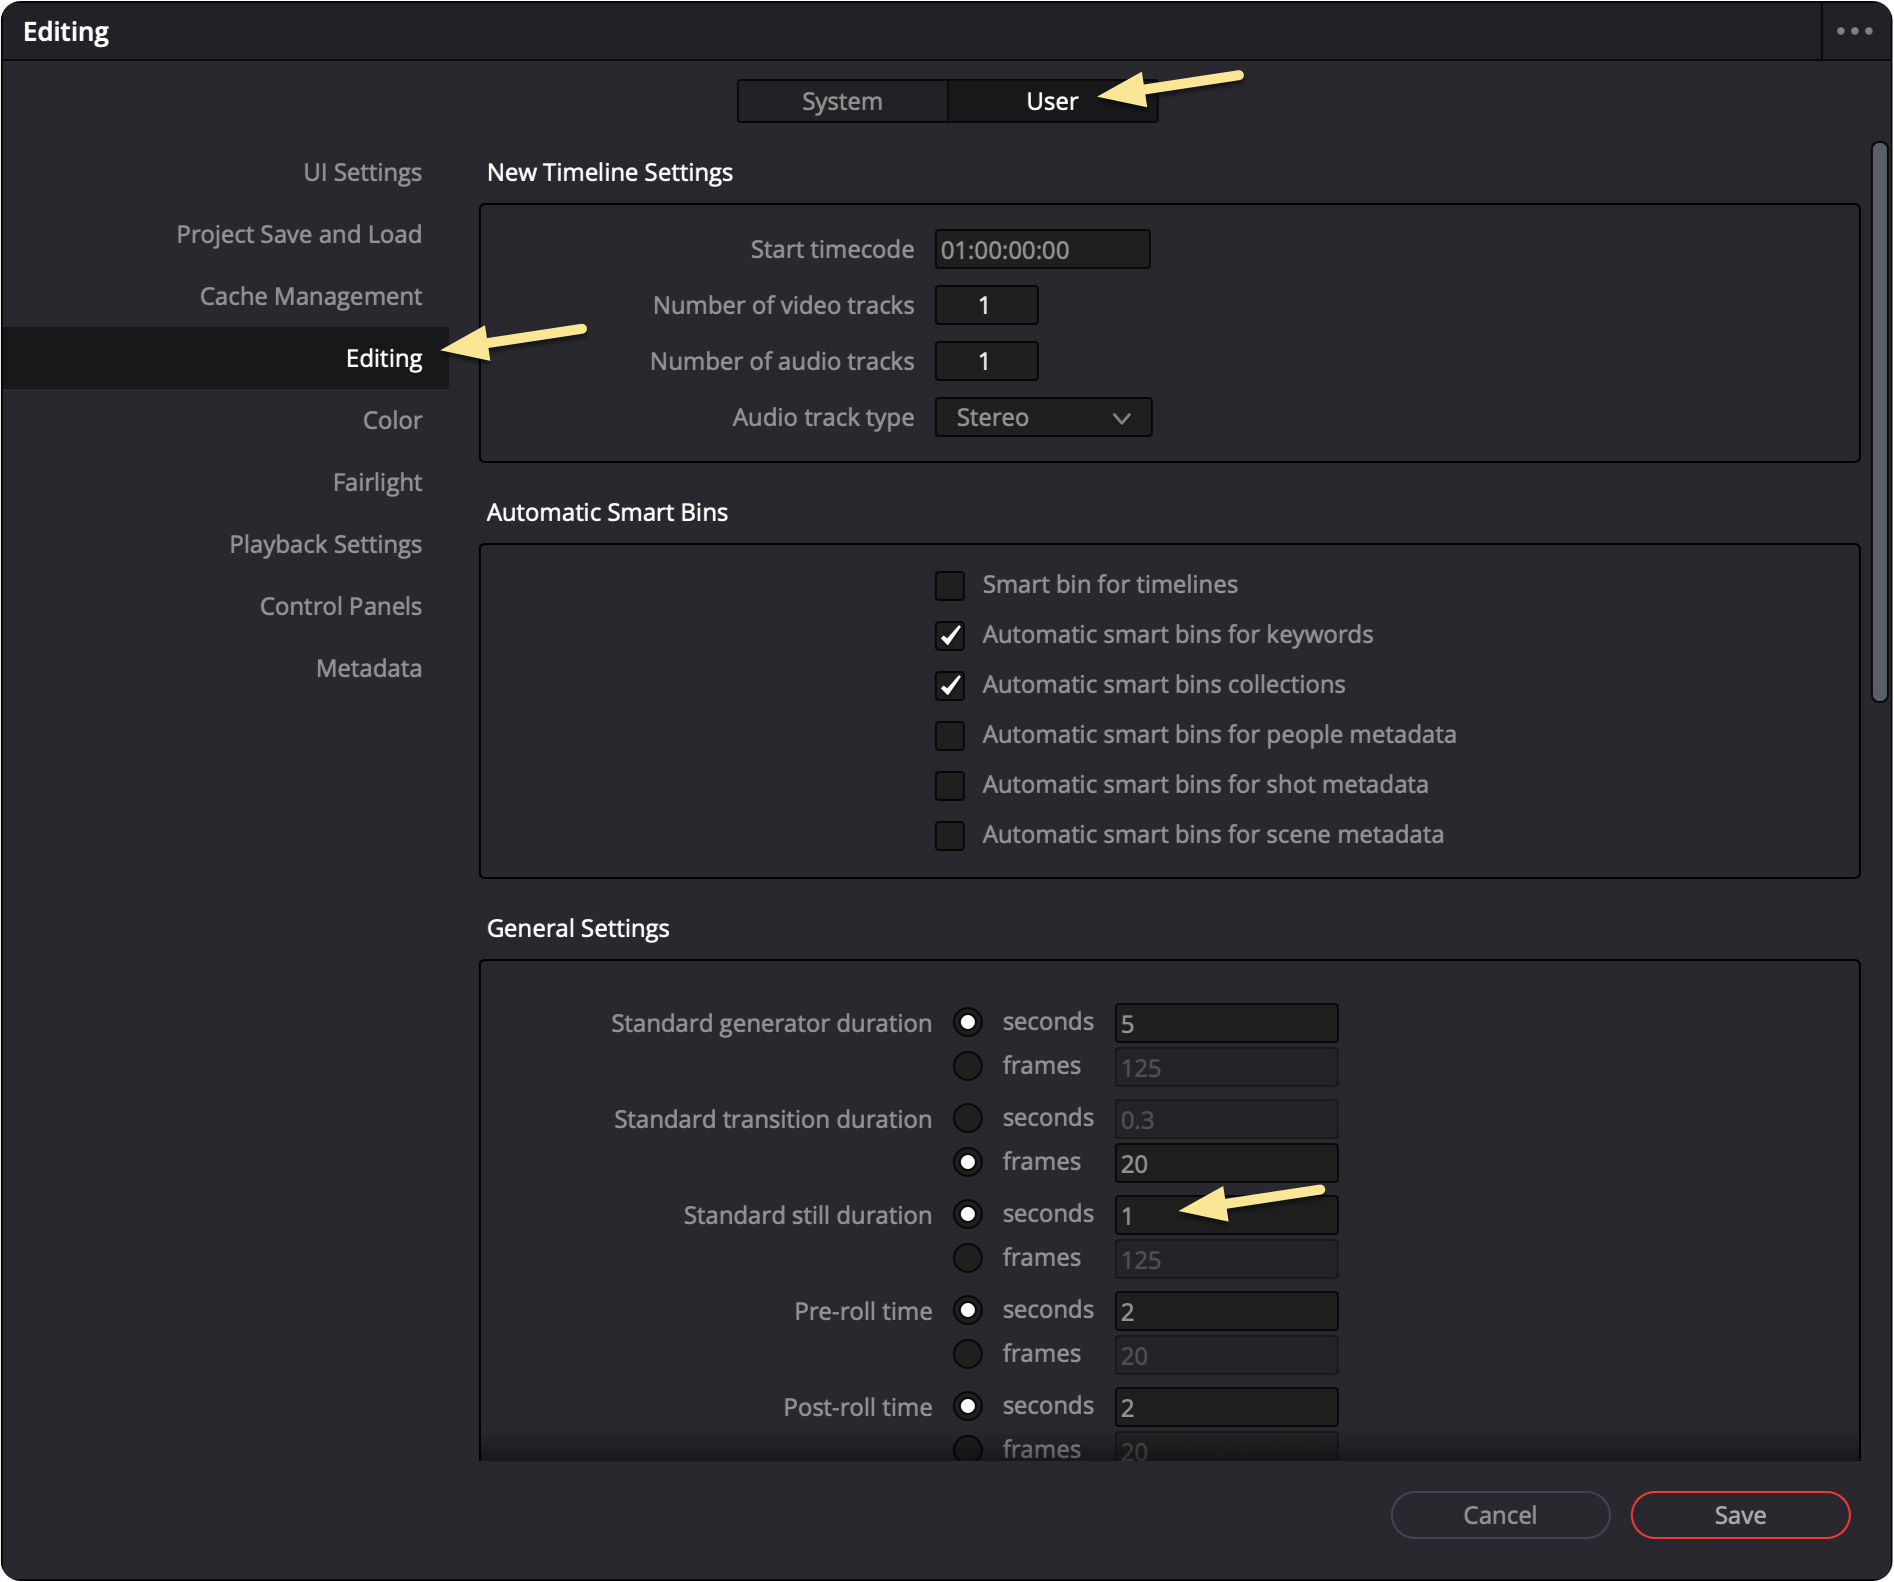
By default, inserted gaps have a fixed duration. You can adjust this in your preferences.
Now, when you insert a gap, it will use your updated duration.
 How to Record a Voiceover in DaVinci Resolve (New Voiceover Tool)
 Audio Clipping on Playback - DaVinci Resolve
 DaVinci Resolve - Frosted Glass Effect