When building a website without a framework like Laravel, there’s a one-to-one connection between the URLs you use to access your site and the directories that exist on your web server.
For example, if you had a URL like http://yourdomain.com/a/b, this would correlate to a directory on your server such as <your-site-document-root>/a/b, and by default, it would try and load an index file from within that directory (e.g. index.html, or index.php).
With frameworks like Laravel this URL-to-directory correlation does not apply. Instead, a routing system is used so that your URLs correlate not to directories, but instructions for your server as to how to handle incoming requests.
Within Laravel, you configure your routing system via the file /routes/web.php. Within this file, you will map out all the different URLs visitors will encounter on your site, and you will program what should happen in response to those URLs.
Here’s what the /routes/web.php file looks like with a fresh install of Laravel:
<?php

use Illuminate\Support\Facades\Route;

/*
|--------------------------------------------------------------------------
| Web Routes
|--------------------------------------------------------------------------
|
| Here is where you can register web routes for your application. These
| routes are loaded by the RouteServiceProvider and all of them will
| be assigned to the "web" middleware group. Make something great!
|
*/

Route::get('/', function () {
    return view('welcome');
});
Summary of points discussed in the video about the default / welcome route:
/welcome is returned./resources/views..blade.php extension because they utilize Laravel’s Blade templating language (covered in an upcoming video)As an example of a new route, imagine we were building an e-commerce application and wanted a route to show products:
Route::get('/products', function() {
    return view('products');
};
Expanding on this, we can include route parameters in curly brackets as part of our URLs. The information gathered from route parameters is made available to the action that is responding to the route.
In the example shown in the video, we used the route parameter {category} to filter what products were shown:
Route::get('/products/{category}', function ($category) {
# For demo purposes, here’s a simple array of products organized by category
$productsByCategory = [
'health' => [
'Band-Aids',
'Johnson’s Baby Powder',
'Tylenol'
],
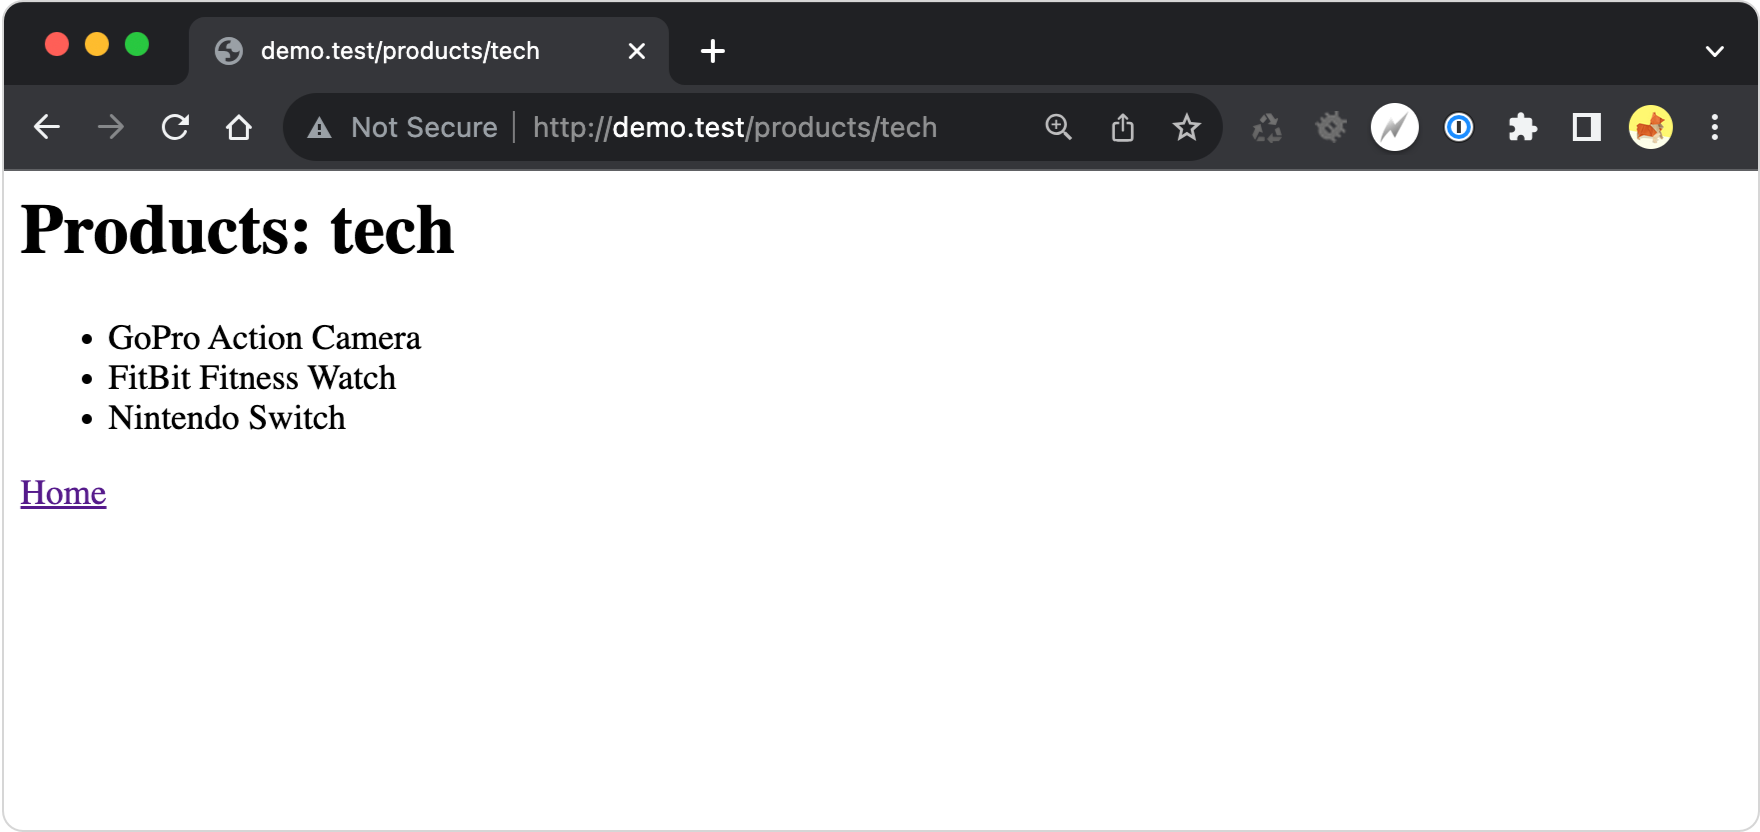
'tech' => [
'GoPro Action Camera',
'FitBit Fitness Watch',
'Nintendo Switch'
],
'books' => [
'The Martian',
'The Great Gatsby',
'Joy Luck Club'
]
];
# From the above array, extract the products based on the $category route parameter
$products = $productsByCategory[$category];
# Return our products View, passing along the selected products and category
return view('products')
->with('products', $products)
->with('category', $category);
});
Here’s the code for the products View used in the above route:
<h1>Products: <?php echo $category?></h1>

<ul>
<?php foreach($products as $product) { ?>
    <li><?php echo $product ?></li>
<?php } ?>
</ul>

<a href='/'>Home</a>
The above View code is incomplete in that it’s missing necessary HTML page structure such as a head, body, meta tags, etc. We’ll add these details in the video where we focus on Views.
Result:
The above covers the bare essentials of working with Laravel’s routing system. Of course there’s a lot more functionality we can get into, but remember the point of this series is to give a broad overview of each fundamental Laravel topic.
With this in mind, a good next step would be to skim the Laravel documentation on Routing - not to master the content, but to preload your brain with all the options that are available. Then, as you start building your own Laravel applications you can return to specific features as needed for a deeper dive.
No subscriptions, no auto-renewals.
Just a simple one-time payment that helps support my free, to-the-point videos without sponsered ads.
Unlocking gets you access to the notes for this video plus all 200+ guides on this site.
Your support is appreciated. Thank you!