Laravel Herd is a fast PHP development environment for macOS. It includes everything you need to start Laravel development, including PHP, Composer, and Nginx.
If you’ve previously been developing Laravel applications with XAMPP, I recommend switching to Herd for these reasons:
The only downside of Herd is it’s not an “all in one” solution like XAMPP because it does not include a database server. For that, they suggest incorporating DBngin.
In this guide I’ll show how to migrate an existing site and MySQL database from XAMPP to Herd and DBngin.
Step one of our migration is to export our site’s existing database from XAMPP’s MySQL so that we can later import it into our new setup with DBngin.
This can be accomplished with the following command, which will create a .sql dump of the given database_name to your desktop:
> /Applications/XAMPP/xamppfiles/bin/mysqldump -u root database_name > ~/Desktop/database_name.sql
Once the export is complete, make sure all services in XAMPP are stopped to avoid any port conflicts with Herd in the following steps.

Next, download and install Herd and DBngin:
Open Herd and go to Settings → General and note the Herd paths that are listed. Any application directories you put in these paths will automatically be configured as sites.

As an example, I will be migrating my local codewithsusan.com site from XAMPP to Herd, so I will start by moving it’s directory from /Applications/XAMPP/xamppfiles/codewithsusan.com to /Users/Susan/Herd/codewithsusan.com:
> mv /Applications/XAMPP/xamppfiles/htdocs/codewithsusan.com /Users/Susan/Herd
Alternatively, instead of moving my sites into the Herd directory, I could add my existing /Applications/XAMPP/xamppfiles/ directory as one of my new Herd paths.
With the paths set, switch to the Sites tab and you should see it automatically recognize your new site folder and configures a URL following the pattern of http://directoryname.test. In my case, that’s http://codewithsusan.com.test

Load the site URL in your browser. On my initial load, I received a Laravel error indicating a TypeError within the code of one of my dependencies.

I suspected this was caused by an incompatibility with a PHP version jump between what I was running in XAMPP and what was now running in Herd. To address this, I ran composer update within my project to grab the latest updates to my dependencies and that did the trick to resolve the TypeError.
My next error though, was about my MySQL connection because I still have to set up DBngin and my database:

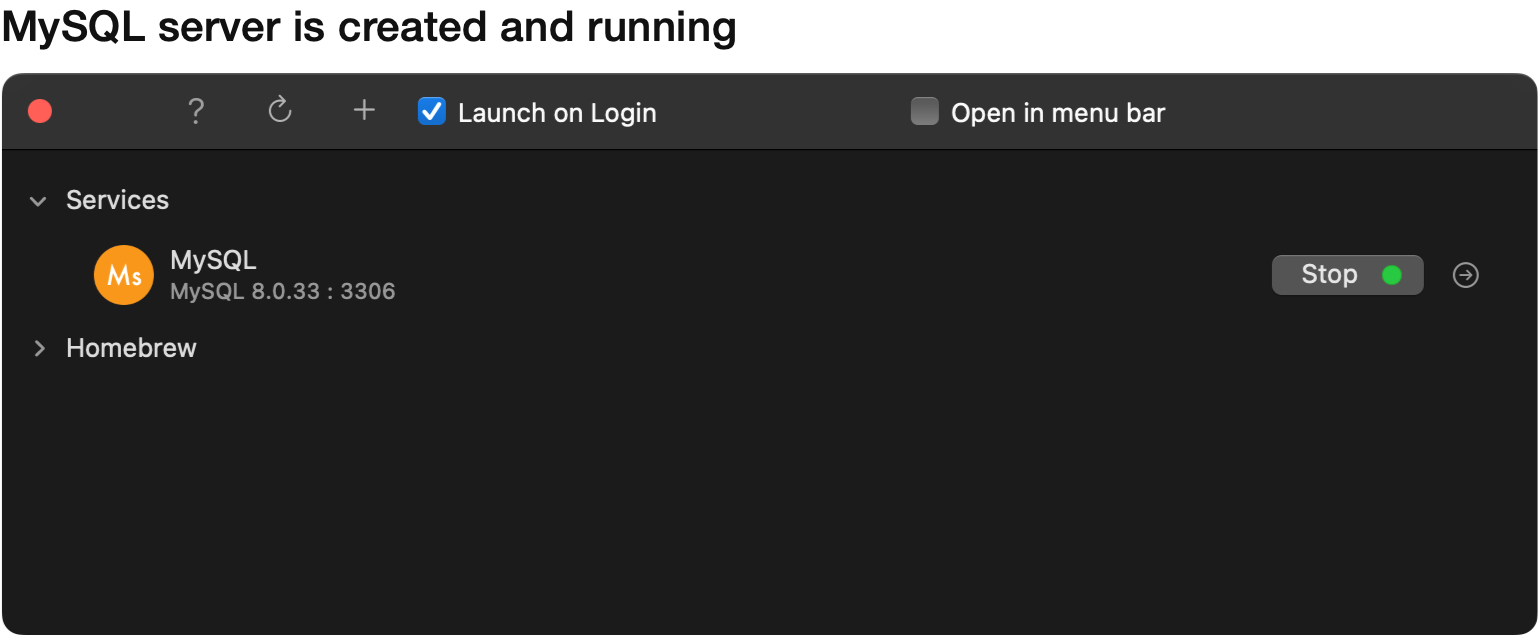
In DBngin, click the plus sign to add a new server. Change the Service to MySQL, and enter MySQL for the name. Leave all the other options as the defaults and click Create.

Once created, make sure your new service is running:
Next we want to create and import the database we backed up in the first step.
To do this, first enter the MySQL command line mode with this command:
> /Users/Shared/DBngin/mysql/8.0.33/bin/mysql -u root -h 127.0.0.1
Within the MySQL command line, use the CREATE DATABASE SQL command to create your new database:
mysql> create database database_name;
You can confirm the database was created with the show databases command:
mysql> show databases;
Next, to import our backup we’ll first select our database with the use command:
mysql> use database_name;
And then import the database backup with source command:
mysql> source ~/Desktop/database_name.sql
When the import is complete you can confirm it worked by outputting a list of tables:
mysql> show tables;
You can use the exit command to exit the MySQL command prompt.
mysql> exit;
With your database set up, you should now be able to refresh your site without any receiving any SQL errors:

When setting up other sites, here are the steps you would need to repeat:
/Applications/XAMPP/xamppfiles/bin/mysqldump -u root database_name > ~/Desktop/database_name.sqlNo subscriptions, no auto-renewals.
Just a simple one-time payment that helps support my free, to-the-point videos without sponsered ads.
Unlocking gets you access to the notes for this video plus all 200+ guides on this site.
Your support is appreciated. Thank you!
 Laravel Herd released for Windows - Easy PHP local development
 CodeIgniter & Laravel Herd - Local development (Mac)
 Uninstall Laravel Herd on Windows