In this guide I’ll show how to create a new Laravel application using the server management tool, Herd. As part of the process, we’ll also set up a MySQL database using DBngin.
Herd is a fast PHP development environment for macOS. It includes everything you need to start Laravel development, including PHP, Composer, and Nginx.
If you're looking for a Windows server solution, check out: New Laravel app on Laragon .
To get started, download and install the necessary software:
With Herd running, find your settings from the H icon in your menu bar. Within the General tab, you’ll see a list of paths where Herd will look for new sites:

In order for Herd to set up a new site, it just needs to exist in one of the directories listed here. For my example, I’ll create a new site in the directory /Users/Susan/Herd.
To navigate to that directory, I’ll load Terminal and run the following command (where ~/ is an alias for my home directory, /Users/Susan):
> cd ~/Herd
Within this directory, use the laravel command to initiate a new application. Replace demo in the following command with the name of your application:
> laravel new demo
The laravel command is something that was installed on your computer as part of the Herd install.
The laravel command will ask you a few questions before setting up your new Laravel application. Below are my notes about each question:
 ┌ Would you like to install a starter kit? ────────────────────┐
 │ › ● No starter kit                                           │
 │   ○ Laravel Breeze                                           │
 │   ○ Laravel Jetstream                                        │
 └──────────────────────────────────────────────────────────────┘
Breeze and Jetstream provide extra utilities in your Laravel application to assist with authentication and user management. If you’re just starting out with Laravel, I suggest keeping things simple and choosing No starter kit - you can always add one later.
 ┌ Which testing framework do you prefer? ──────────────────────┐
 │ › ● PHPUnit                                                  │
 │   ○ Pest                                                     │
 └──────────────────────────────────────────────────────────────┘
If you have experience a preference for PHPUnit vs. Pest, choose the appropriate option here. Otherwise, just leave it as the default PHPUnit. You can always change this later.
 ┌ Would you like to initialize a Git repository? ──────────────┐
 │ ● Yes / ○ No                                                 │
 └──────────────────────────────────────────────────────────────┘
If you plan to use Git version control for this application, choose Yes here.
After the application has been created, return to your Herd settings and find the Sites tab. Herd should automatically detect your new application and generate a URL following the pattern of http://directoryname.test.

Load the new URL in your browser and you should see the default welcome screen of your new Laravel application:

Next, let’s set up our application with a database via DBngin.
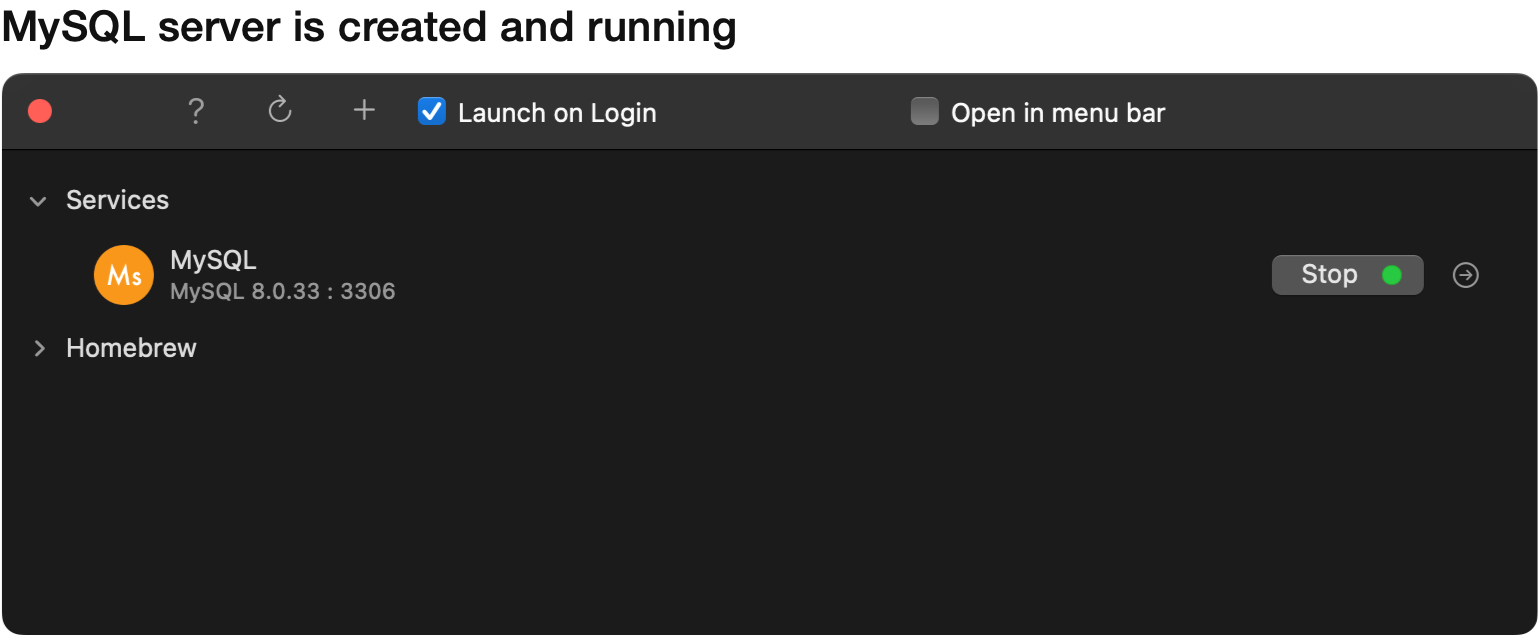
In DBngin, click the plus sign to add a new server. Change the Service to MySQL, and enter MySQL for the name. Leave all the other options as the defaults and click Create.

Once created, make sure your new service is running:
Within the root of your application, open the .env file and locate your database related configurations:
DB_CONNECTION=mysql
DB_HOST=127.0.0.1
DB_PORT=3306
DB_DATABASE=demo
DB_USERNAME=root
DB_PASSWORD=
These default settings should not need to be changed to connect to your DBngin MySQL database, but I wanted you to be aware of where these settings are/what they are set to in case you do have connection issues. Note how DB_DATABASE was set to be named after the name of your application.
With these settings in place, we can prompt Laravel to create our new database using the following command:
> php artisan migrate
This should prompt you to create your new database:
   WARN  The database 'demo' does not exist on the 'mysql' connection.

 ┌ Would you like to create it? ────────────────────────────────┐
 │ ● Yes / ○ No                                                 │
 └──────────────────────────────────────────────────────────────┘
Choose yes and the migration will complete creating your new database and setting up the default tables set up with Laravel’s migration system.
  INFO  Preparing database.

  Creating migration table .......................................................... 48ms DONE

   INFO  Running migrations.

  2014_10_12_000000_create_users_table .............................................. 20ms DONE
  2014_10_12_100000_create_password_reset_tokens_table .............................. 13ms DONE
  2019_08_19_000000_create_failed_jobs_table ......................................... 9ms DONE
  2019_12_14_000001_create_personal_access_tokens_table ............................. 14ms DONE
With the above steps complete, your database is now set up and because the migrations were successful, you know your application is configured correctly to connect to the database.
The above steps covered everything you need to initialize a new Laravel application and database using Herd and DBngin. Of course, your next steps are to start coding in your application and making it do what you want. To help with that, check out my playlist, Laravel - In a Nutshell.
No subscriptions, no auto-renewals.
Just a simple one-time payment that helps support my free, to-the-point videos without sponsered ads.
Unlocking gets you access to the notes for this video plus all 200+ guides on this site.
Your support is appreciated. Thank you!
 Uninstall Laravel Herd on Windows
 Migrating Laravel site from XAMPP to Herd and DBngin
 Migrate from Laragon to Laravel Herd