This guide covers a practical Git workflow inside Positron, a data science–focused IDE for R and Python.
Version control solves two core problems:
Even when you’re working alone, version control acts like a time machine. If something breaks or you take your code in the wrong direction, you can always return to a previous state.
Before using Git in Positron, Git must be installed on your system. To confirm it is:
which git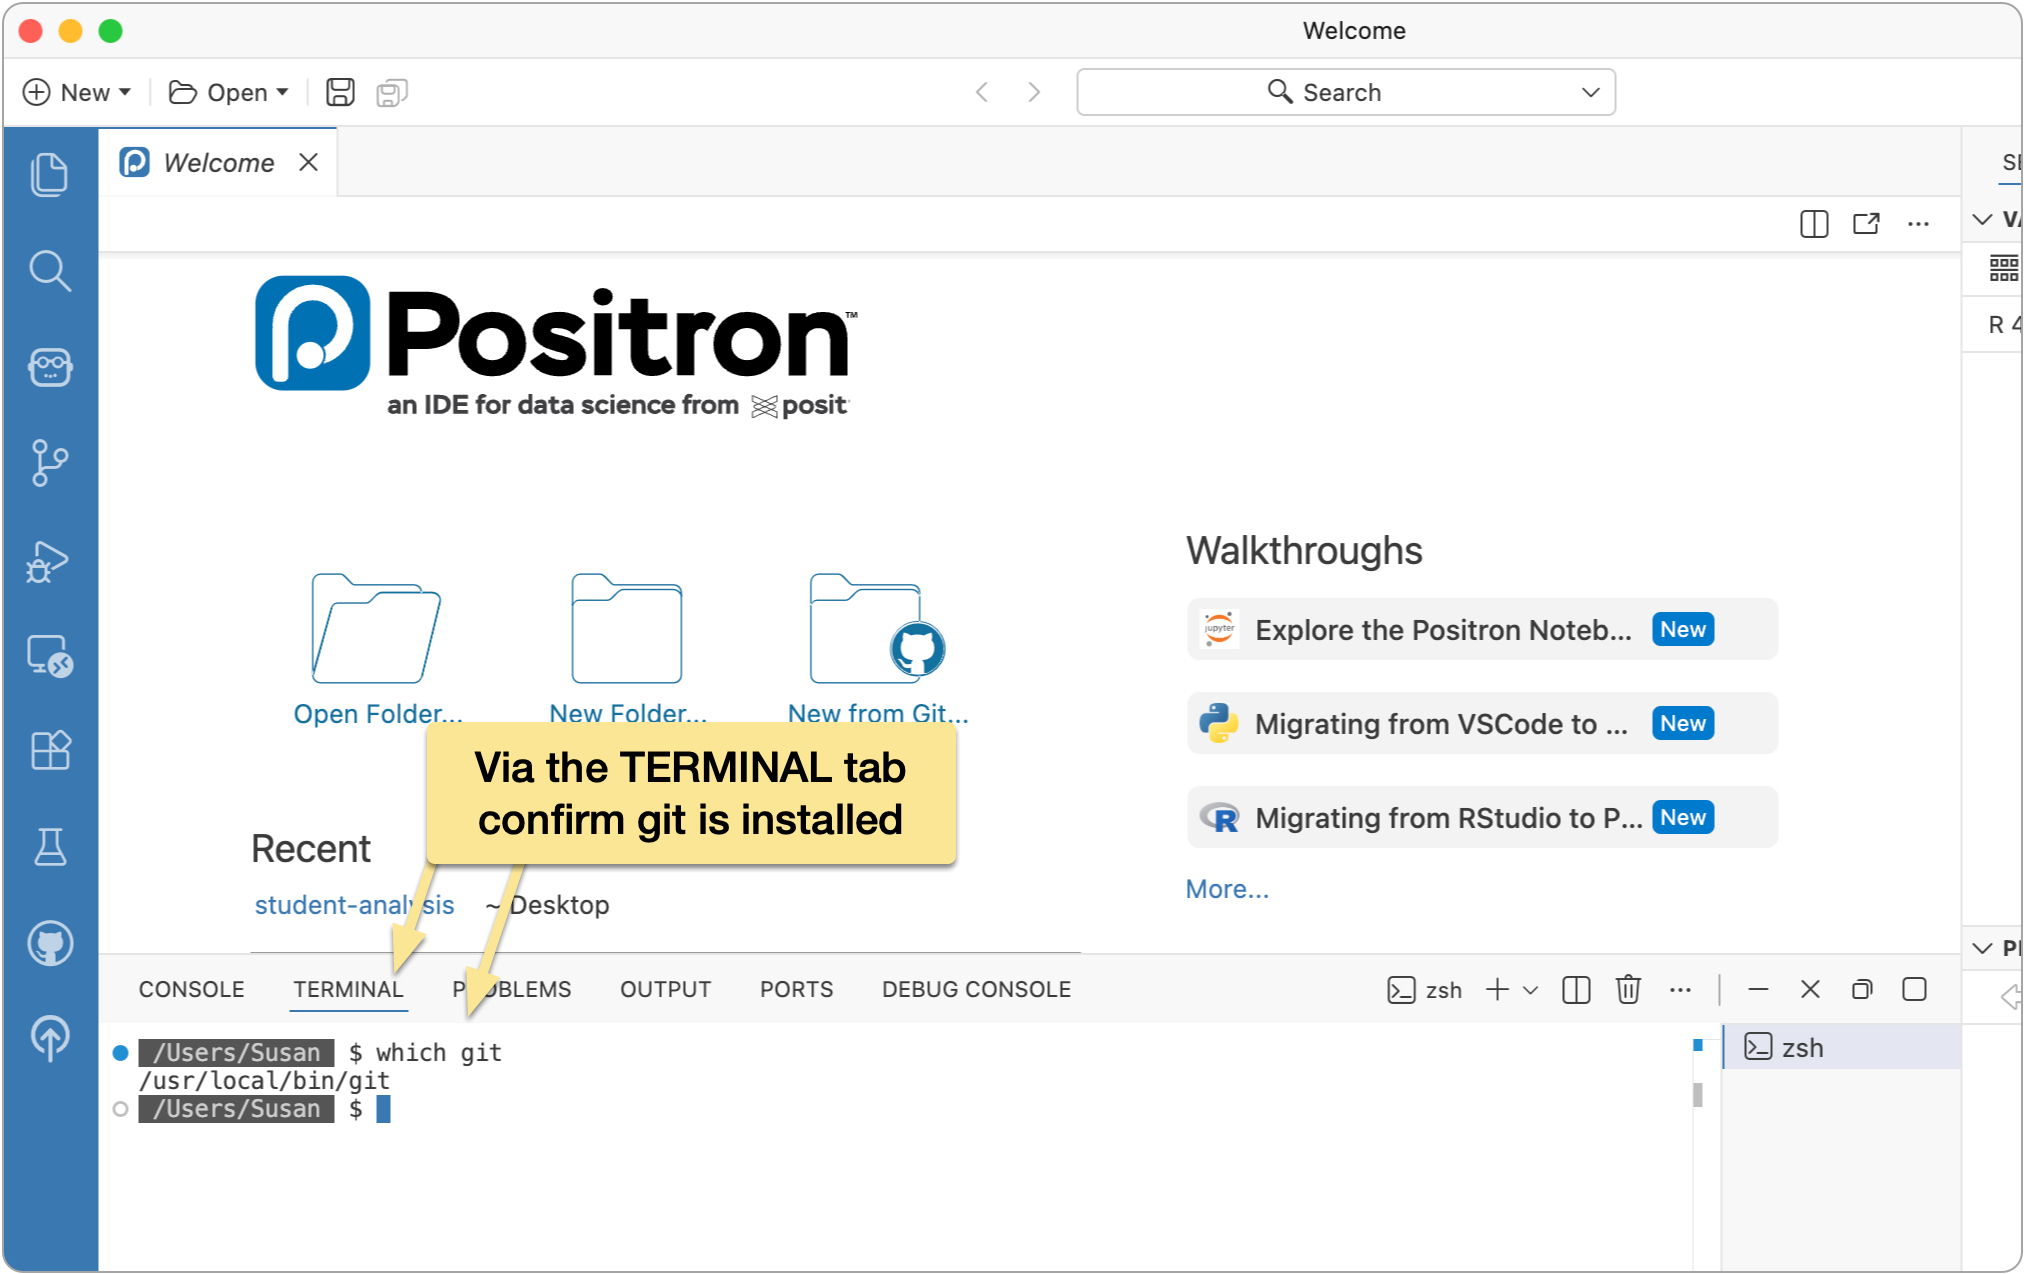
If Git is installed, you’ll see a path to the executable. If not, you’ll need to install Git from https://git-scm.com/install/mac.
Now that we have confirmed Git is installed, we’ll do some initial configurations.
Still in the Terminal tab in Positron, run the following command (edit to use your name) to identify the name to be associated with your Git interactions:
> git config --global user.name "Susan"
Also set your email address (replace with your own):
> git config --global user.email "mail@codewithsusan.com"
Set the default branch name for new repositories to main (the GitHub.com convention) with this command:
> git config --global init.defaultBranch main
Run the following command so that Git will ignore filemode (permission) changes:
> git config --global core.filemode false
Finally, run the following command to configure how Git handles line endings in files:
> git config --global core.autocrlf input
That’s it for Git configs, so let’s move on...
When creating a new repository on GitHub, it’s good practice to:
The README provides basic information about the project, while the .gitignore tells Git which files should not be tracked, such as environment-specific or temporary files.
GitHub automatically creates an initial commit when the repository is set up.
Once the repository exists on GitHub, the next step is to clone it locally.
In Positron:
At this point, you have two copies of the project:
As you edit files or add new ones, Git detects those changes automatically.
Before creating a commit, files must be staged. Staging lets you choose exactly which changes will be included in the next commit.
Common file states include:
Staging gives you fine-grained control over your commit history.
Once files are staged:
The first time you connect to GitHub from Positron, you’ll be prompted to authenticate. After that, syncing becomes a routine part of your workflow.
Positron makes it easy to:
These features encourage experimentation, since you can always undo work that doesn’t pan out.
You don’t make commits after every single change you make. Instead, make commits when you’re at notable “save points”. Here are some examples:
If in doubt, commit early and often. It never hurts to have a healthy working history of how your project is evolving.
The above steps outline the essentials of getting a Git workflow set up for a project, and for many, that’s as far as they’ll need to take Git.
That being said, there are many more things you can do with Git that you may wish to explore as you get more comfortable with it including:
No subscriptions, no auto-renewals.
Just a simple one-time payment that helps support my free, to-the-point videos without sponsered ads.
Unlocking gets you access to the notes for this video plus all 200+ guides on this site.
Your support is appreciated. Thank you!
 Goodbye RStudio, Hello Positron
 How to Manage Settings in Positron
 Fully Remove Positron from Mac (Clean Reinstall Guide)