In this guide, we’ll walk through how to dynamically download data from an OSF project using R.
Being able to import data directly from OSF into R ensures that your workflow is fully reproducible because you will always be working with the most current data, and others can easily reproduce your results from the same source.
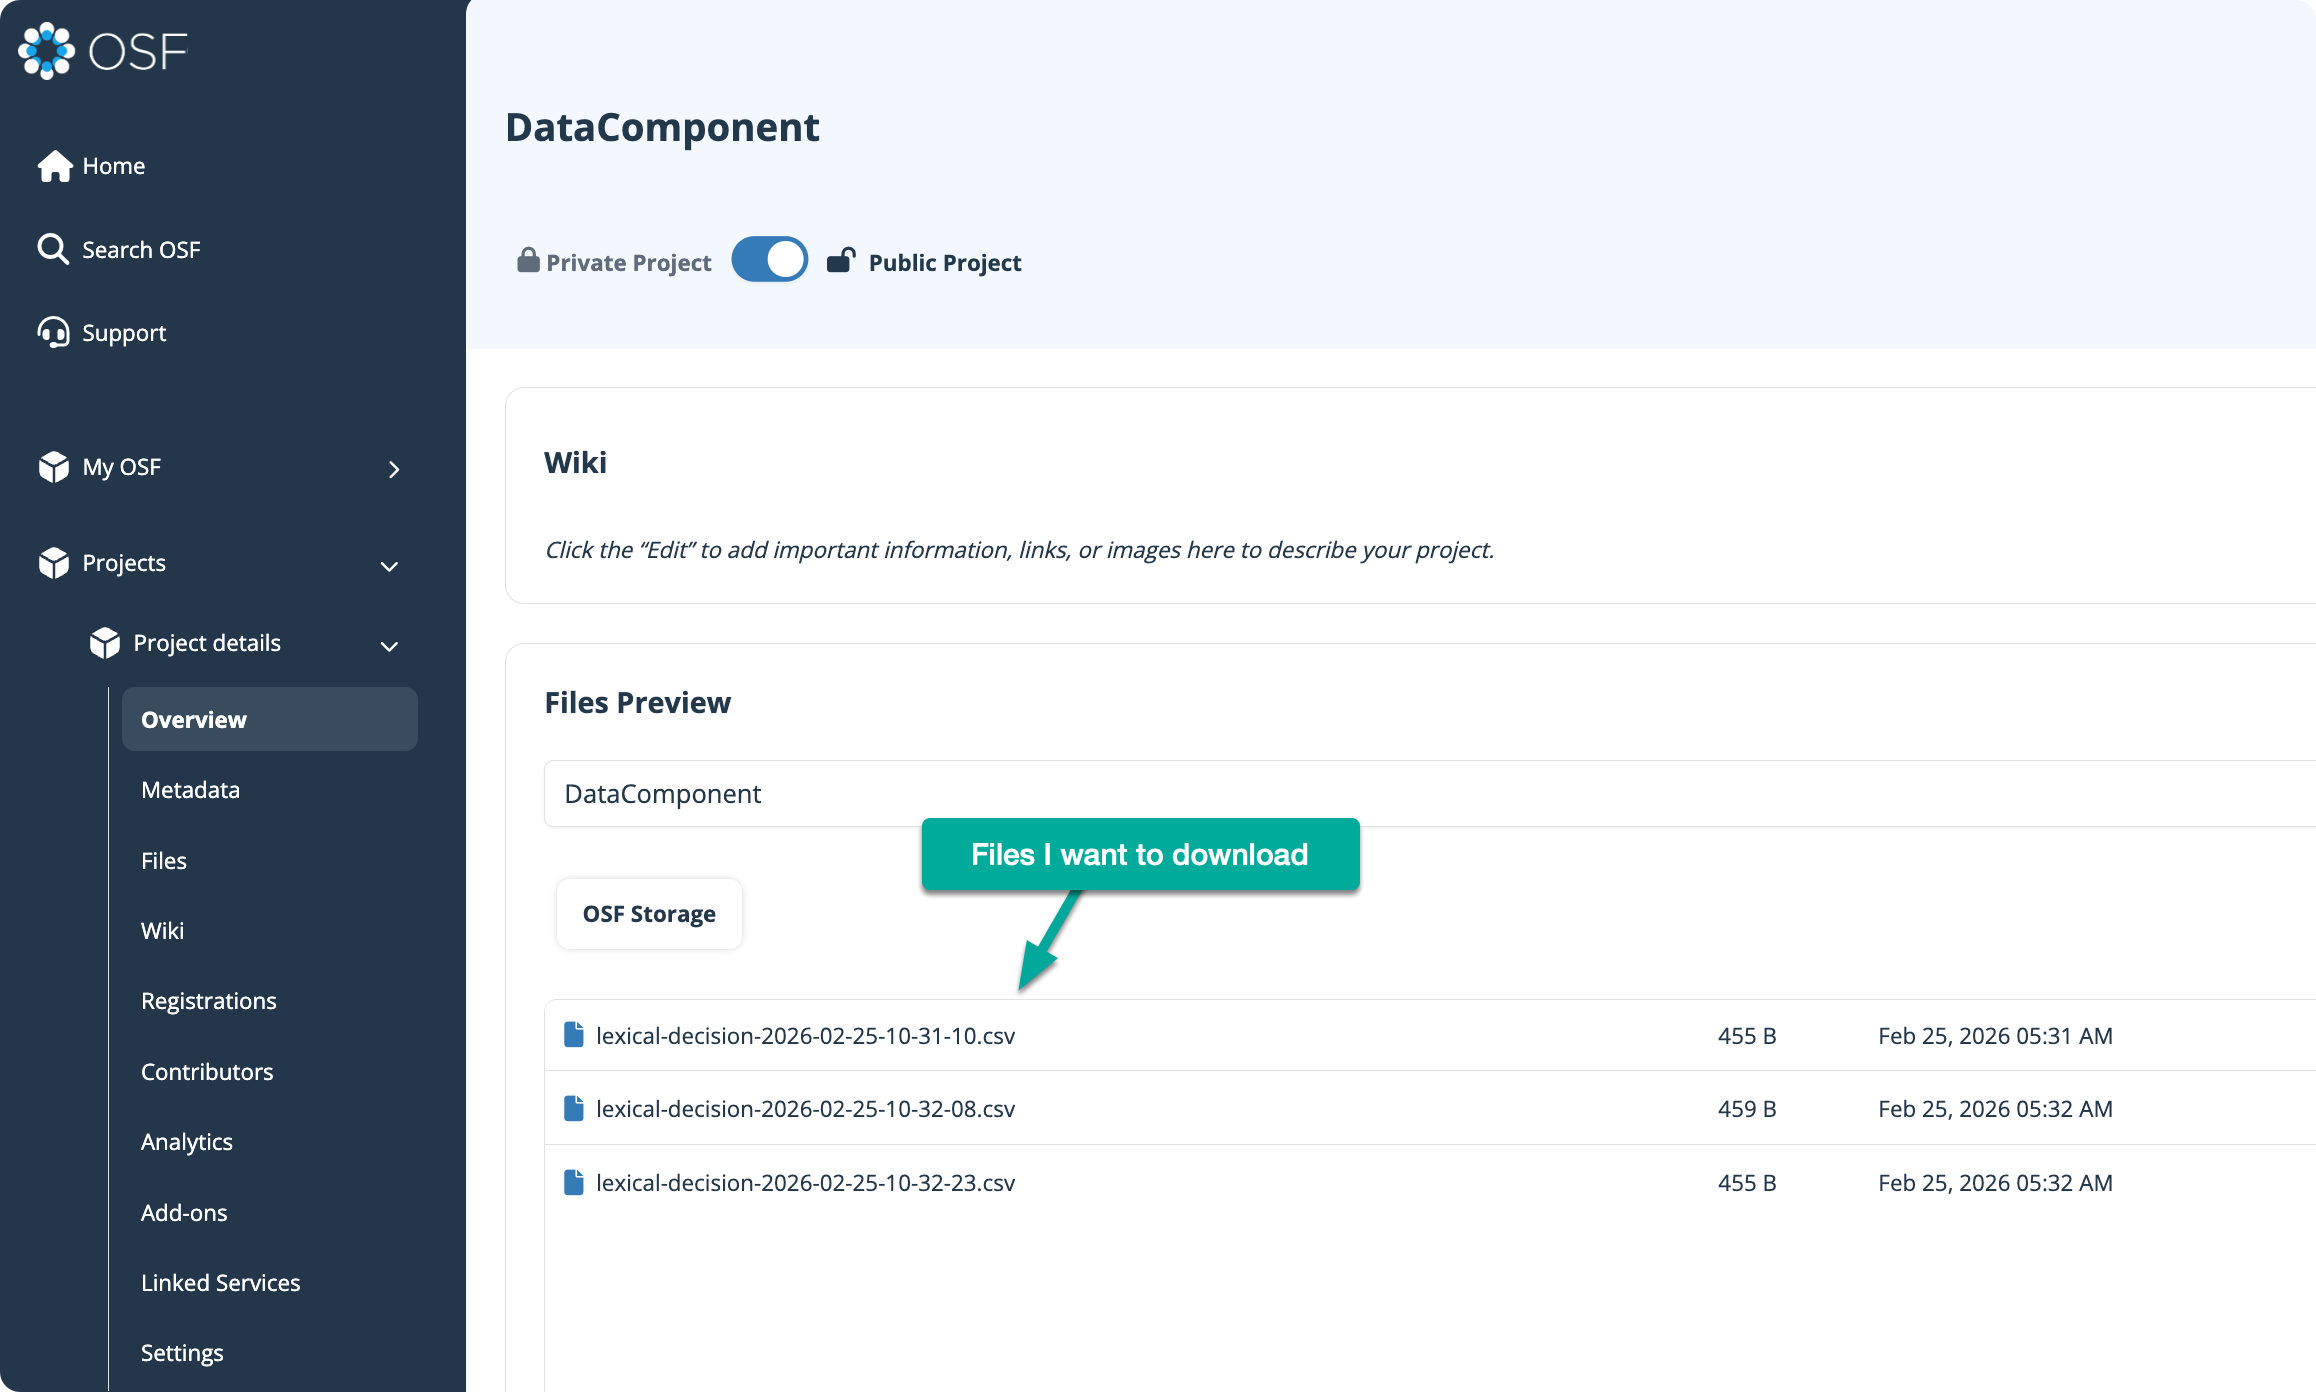
For this example, I’m using an OSF project called “Lexical Decision Task”. Inside that project is a component named DataComponent, which contains three example data files we’ll download.
To communicate with OSF via R, you’ll need a personal access token.
In OSF, go to:
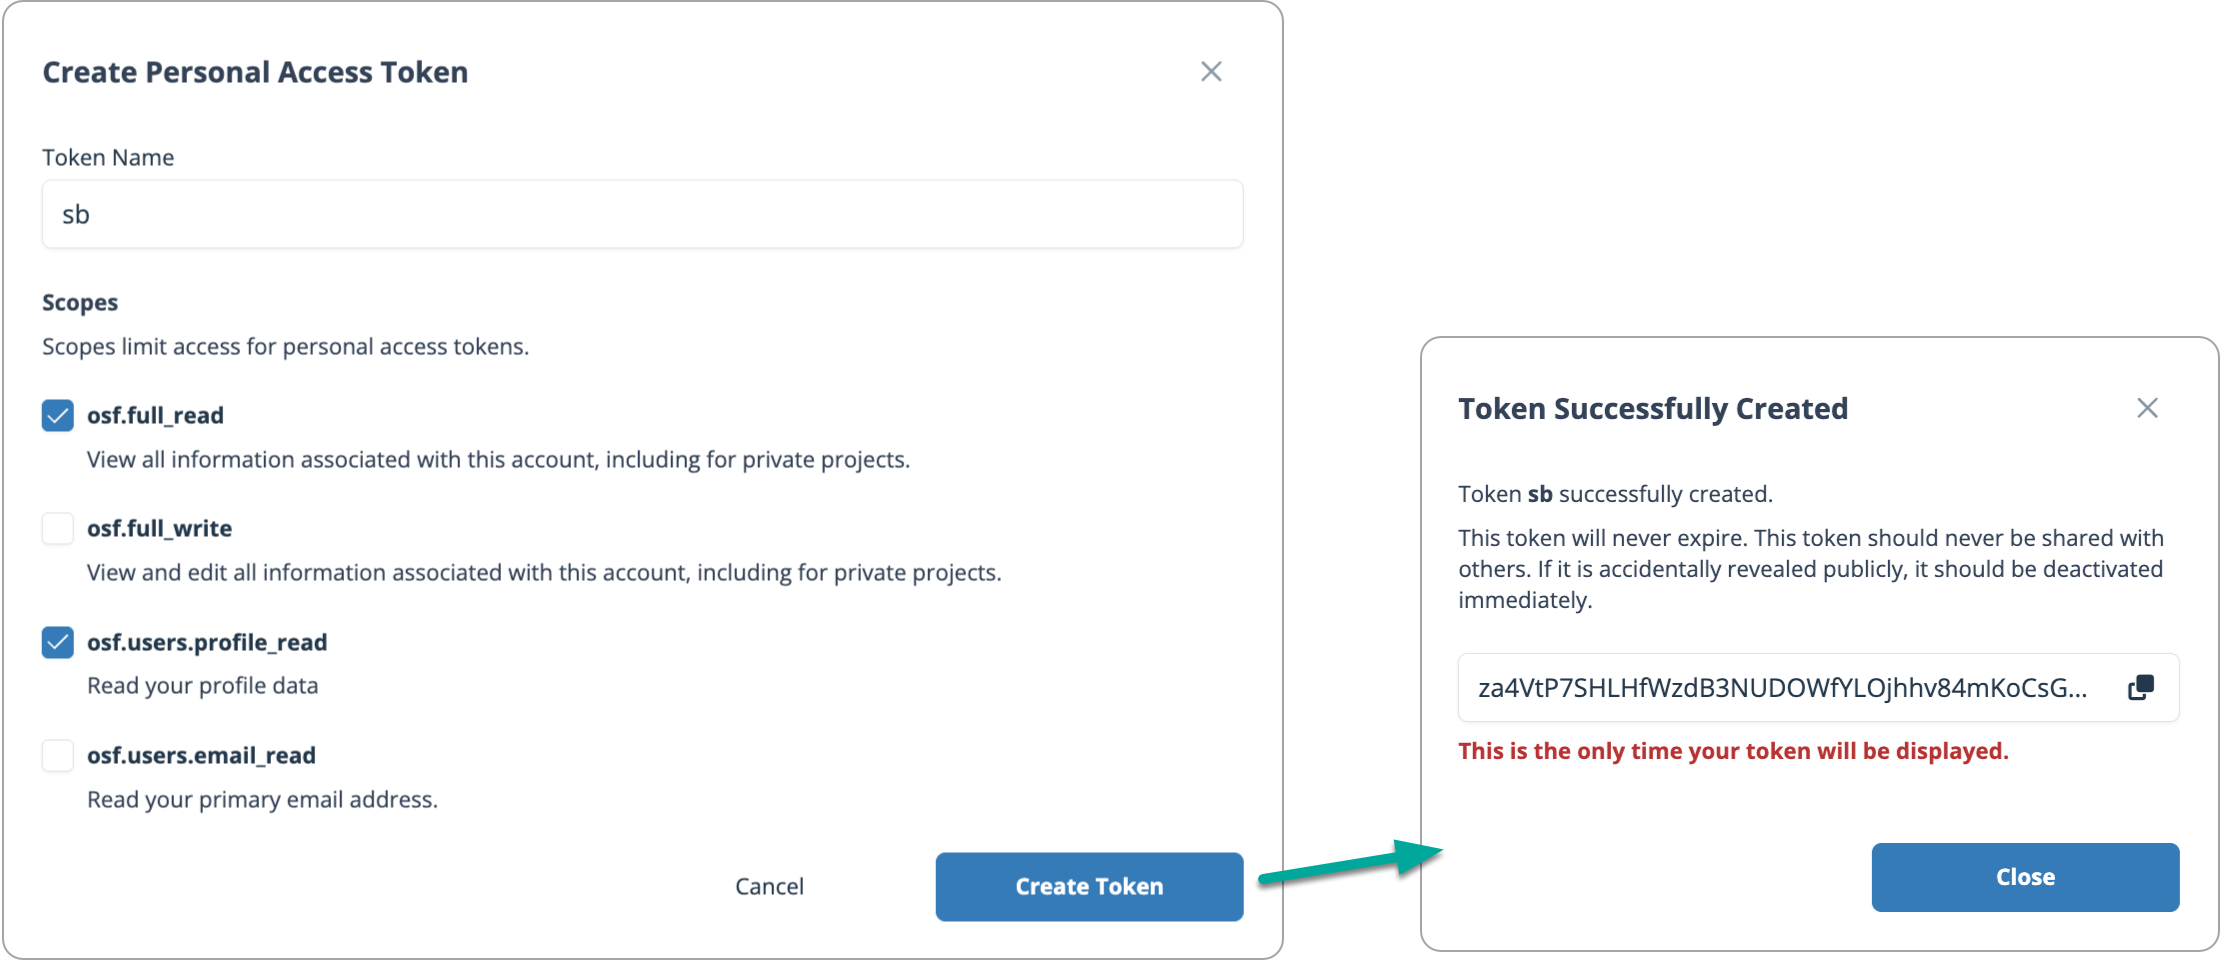
Settings → Personal Access Tokens → Create Token
Give your token a name. In the video example, I use sb (my initials).
Enable the required permissions. For this demo, you need at minimum:
osf.full_readosf.users.profile_readAfter creating the token, copy it.
In your R project, create or edit a file named .Renviron and add:
OSF_TOKEN=your token here
Restart your R session so the new variable is loaded.
A .Renviron file is a configuration file that defines environment variables automatically loaded when R starts. Environment variables provide a way to store sensitive information separately from your script files.
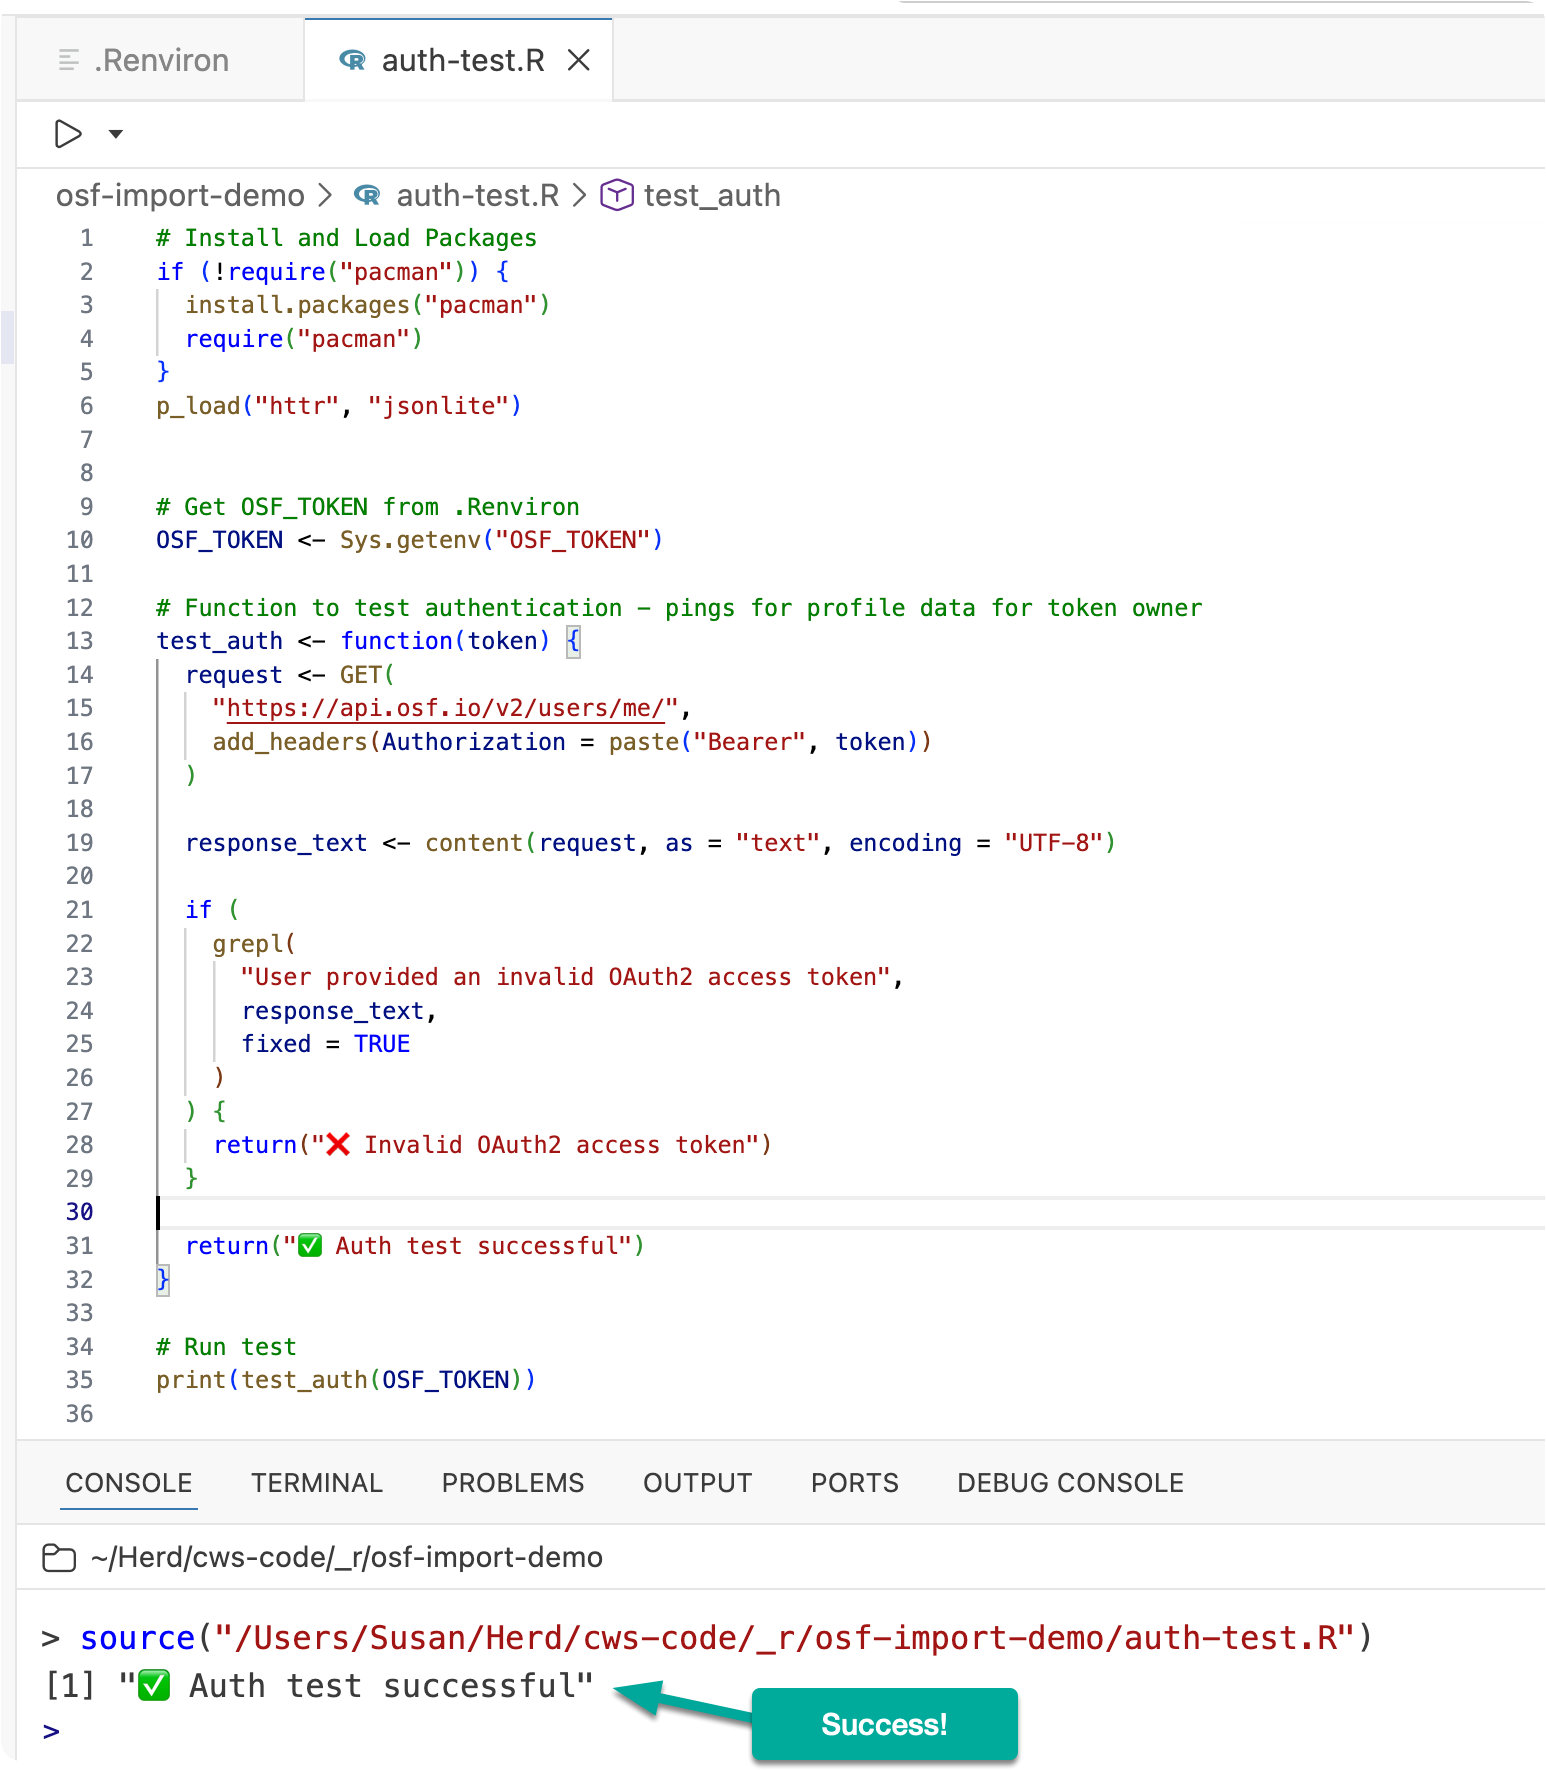
Next, create a file called auth-test.R to confirm your token works:
# Install and Load Packages
if (!require("pacman")) {
  install.packages("pacman")
  require("pacman")
}
p_load("httr", "jsonlite")

# Get OSF_TOKEN from .Renviron
OSF_TOKEN <- Sys.getenv("OSF_TOKEN")

# Function to test authentication - pings for profile data for token owner
test_auth <- function(token) {
  request <- GET(
    "https://api.osf.io/v2/users/me/",
    add_headers(Authorization = paste("Bearer", token))
  )

  response_text <- content(request, as = "text", encoding = "UTF-8")

  if (
    grepl(
      "User provided an invalid OAuth2 access token",
      response_text,
      fixed = TRUE
    )
  ) {
    return("❌ Invalid OAuth2 access token")
  }

  return("✅ Auth test successful")
}

# Run test
print(test_auth(OSF_TOKEN))
If everything is set up correctly, you should see:
✅ Auth test successful
If you see:
❌ Invalid OAuth2 access token
Double-check your token and .Renviro setup.
Now that authentication works, let’s download files from your OSF component.
Create a file called download.R and paste the following code. Be sure to set your component’s NODE ID where indicated.
# Install and Load Packages
if (!require("pacman")) {
  install.packages("pacman")
  require("pacman")
}
p_load("httr", "jsonlite", "fs")


OSF_TOKEN <- Sys.getenv("OSF_TOKEN")


# Each OSF project and component has a unique 5-character node ID.
# To find it, open your OSF project component in a browser:
# Example URL: https://osf.io/qkthv/overview
# The part after "osf.io/" (here, "qkthv") is the node ID
# Copy and paste that string below.
NODE <- "your-node-id-here"

# Fetch file listing
BASE <- paste0("https://api.osf.io/v2/nodes/", NODE, "/files/osfstorage/")
res <- GET(BASE, add_headers(Authorization = paste("Bearer", OSF_TOKEN)))
stop_for_status(res)
page <- fromJSON(content(res, as = "text", encoding = "UTF-8"), flatten = TRUE)

## Follow pagination if present
all <- list(page)
while (
  !is.null(all[[length(all)]]$links$`next`) &&
    nzchar(all[[length(all)]]$links$`next`)
) {
  nxt <- all[[length(all)]]$links$`next`
  res <- GET(nxt, add_headers(Authorization = paste("Bearer", OSF_TOKEN)))
  stop_for_status(res)
  all[[length(all) + 1]] <- fromJSON(
    content(res, as = "text", encoding = "UTF-8"),
    flatten = TRUE
  )
}

# Combine pages and keep only actual files
rows <- do.call(rbind, lapply(all, function(p) p$data))
files <- subset(rows, attributes.kind == "file")

message("Found ", nrow(files), " matching files.")

# Download
if (!dir_exists("osf_downloads")) {
  dir_create("osf_downloads")
}

for (i in seq_len(nrow(files))) {
  name <- files$attributes.name[i]
  path <- fs::path("osf_downloads", name)

  download_url <- files$links.download[i]

  r <- GET(
    download_url,
    add_headers(Authorization = paste("Bearer", OSF_TOKEN)),
    write_disk(path, overwrite = TRUE)
  )

  stop_for_status(r)
  message("Saved: ", path)
}

# Remove intermediate steps
rm(
  all,
  files,
  page,
  r,
  res,
  rows,
  BASE,
  i,
  name,
  NODE,
  path,
  OSF_TOKEN,
  download_url
)
After running the script, your OSF files will be downloaded into a directory named osf_downloads/

With the data downloaded, you can then import and process it just like you would any other data file in R. Below is some example code.
# Install and Load Packages
if (!require("pacman")) {
  install.packages("pacman")
  require("pacman")
}
p_load("readr", "dplyr", "purrr", "tibble")

# Directory containing the CSV files
dir_path <- "osf_downloads"

# Get full paths to all CSV files
files <- list.files(dir_path, pattern = "\\.csv$", full.names = TRUE)

# Example getting a single file
data1 = read.csv(files[1])

# Read and combine into one tibble
combined_data <- files %>%
  set_names(basename(.)) %>% # use filename as name
  map_dfr(
    ~ read_csv(.x),
    .id = "source_file" # new column with file name
  )

combined_data
No subscriptions, no auto-renewals.
Just a simple one-time payment that helps support my free, to-the-point videos without sponsered ads.
Unlocking gets you access to the notes for this video plus all 200+ guides on this site.
Your support is appreciated. Thank you!
 Goodbye RStudio, Hello Positron
 How to Set Up and Use AI Features in Positron
 R Targets Package Tutorial: Build Reproducible Data Pipelines