Using VSCode’s Remote Development extension, you can do development work directly on a remote server. This offers a lot of benefits versus the traditional approach of running a development server on your own computer.
There are three options when it comes to using this extension:
For this example, we’ll demonstrate the first option: Remote - SSH.
Here are the selling points of remote development, taken from the extension home page:
The Remote - SSH extension lets you use any remote machine with a SSH server as your development environment. This can greatly simplify development and troubleshooting in a wide variety of situations. You can:
- Develop on the same operating system you deploy to or use larger, faster, or more specialized hardware than your local machine.
- Quickly swap between different, remote development environments and safely make updates without worrying about impacting your local machine.
- Access an existing development environment from multiple machines or locations.
- Debug an application running somewhere else such as a customer site or in the cloud.
No source code needs to be on your local machine to gain these benefits since the extension runs commands and other extensions directly on the remote machine. You can open any folder on the remote machine and work with it just as you would if the folder were on your own machine.
In this note set we’ll see how to use VSCode’s Remote Development extension to do development work directly on a server. At the end, I‘ll also share some tips to optimize the remote development experience.
First up, you’ll need a web server you have SSH access to. E.g. from command line you should be able to log in to the server like so:
> ssh username@your.servers.ip.address
For my example, I’ll use a LEMP (Linux, Nginx, MySQL, PHP) server running on DigitalOcean, but you can use any server software and provider you want.
Next, in VSCode install the Remote - SSH extension:

Once the extension is installed, click the remote connection icon on the bottom left of your VSCode window:

In the command palette that pops up, choose Open SSH Configuration File...:

...and then choose choose the first option which should be (/your/home/directory/.ssh/config).

In your SSH config file, add the following config at the bottom, updating your.server.ip.address and my-server to whatever alias name you’d like.
Host my-server
    HostName your.server.ip.address
    User root
    ServerAliveInterval 60
    ServerAliveCountMax 10

After adding these lines, save your changes.
Let’s now connect to the server we just configured.
Click the connection icon (bottom left of VSCode window) again. In the command palette that pops up, choose Connect Current Window to Host... and choose the my-server host that we just added:

This should establish a new remote connection with your DigitalOcean server. Note that anything you do in this window will now occur on your server.
You can tell when a VSCode window is connected to the server by the remote development button/icon on the bottom left of the screen:

Not all the VSCode extensions you’ve installed locally will be automatically be available when connected to your server; you’ll need to install them there.
To do this, open your Extensions and find any extensions that are greyed out and choose Install in SSH my-server.
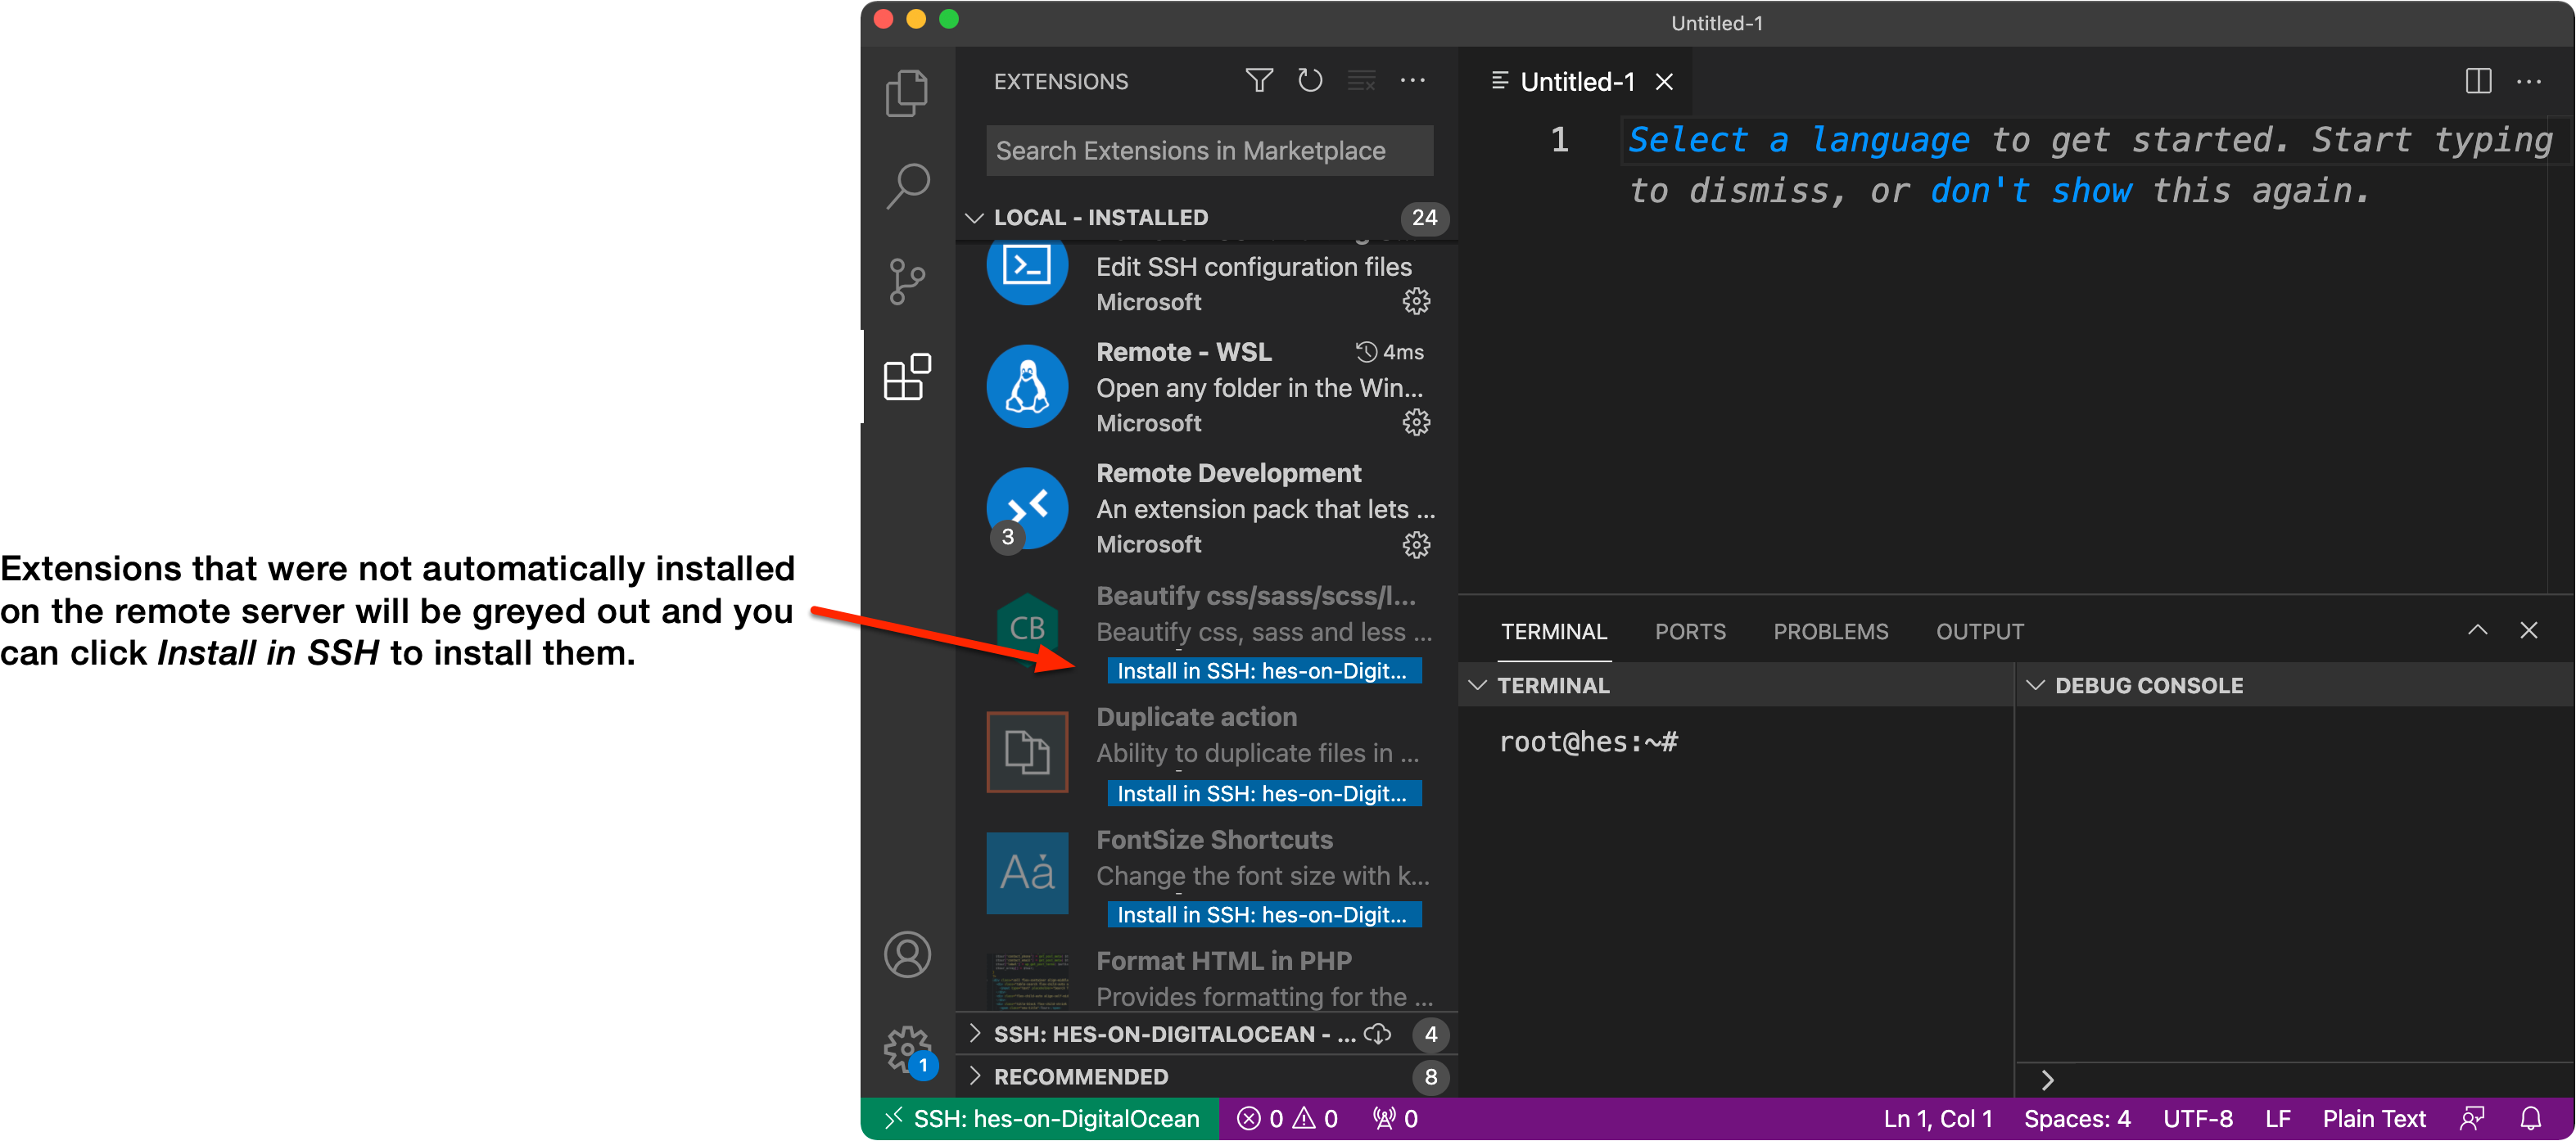
I suggest only installing extensions you really need/use, as an excessive amount of extensions can slow down the remote development process.
Now that you’re connected to your server, anything you do in this VSCode window will happen on the server.
Knowing this you could open files/folders in the File Explorer, or interact with the server via the Terminal (examples shown in the video).
Often times, when you’re doing remote development like this, you’re doing so on a “development” copy of your application - a version you use to build new features, work out any bugs, etc. before your code gets deployed to a production server. Because of this, it’s suggested you restrict your development server so the general public can not access your “work in progress” application.
For example, you could set up a basic HTTP auth system so that a username/password is required to access the site.
If you’re working on a budget server without a lot of resources (memory, cpu, etc.), or if you have a slower internet connection - the remote development experience can be clunky. You may see your connection frequently drop, and then VSCode will get stuck in a loop of trying to reconnect, failing each time as it reaches a timeout threshold before it can re-establish the connection. During this loop, you might see your server max out on memory causing it to lock up.
To address this, I have three tips:
Open your VSCode settings and search for Remote.SSH: Connect Timeout. Increase the default value of 15 seconds to 60 seconds to reduce timeouts:

Note how when we set up our SSH config we included the following two lines:
ServerAliveInterval 60
ServerAliveCountMax 10
These settings will also help reduce timeout and reconnection issues.
Finally, if you’re working on a budget server with low memory, you can enable a swap file, which is an area on a hard drive that your server can temporarily store data to if it runs out of RAM memory.
To configure a swap file on a Ubuntu server, run through the following commands.
First, create the swap file:
> sudo fallocate -l 4G /swapfile
Next, adjust permissions on the resulting swap file so it isn’t readable by anyone besides root:
> sudo chmod 600 /swapfile
Next, tell the system to set up the swap space:
> sudo mkswap /swapfile
Next, enable the swap space:
> sudo swapon /swapfile
Finally, we want to make it so the server always enables this swap space, even after a reboot. To do this run the following command which will add the swap file to your file systems table (fstab) config file:
> sudo echo '/swapfile none swap sw 0 0' >> /etc/fstab
Confirm it worked: You can confirm your swap file is set up correctly with the following command:
> sudo swapon -s
Expected output:
Filename                Type        Size    Used    Priority
/swapfile               file        4194300 0       -2
No subscriptions, no auto-renewals.
Just a simple one-time payment that helps support my free, to-the-point videos without sponsered ads.
Unlocking gets you access to the notes for this video plus all 200+ guides on this site.
Your support is appreciated. Thank you!
 VSCode PHP CS Fixer: executablePath not found (junstyle)
 Save Files as Root in VSCode Remote SSH
 Completely uninstall VSCode (Visual Studio Code) on Windows