In this course we will be building web-based experiments, and eventually we will share these experiments on real-world web servers so they are publicly accessible to participants.
Before we get to that point, though, we need a way to build and run experiments locally on our computers. In this local context, we will develop and test experiments so they are working as expected before we share them with the real-world.
The above two “contexts” in which we will run our experiments are often referred to as environments:
In this note set, we will set up a development environment. Later in the course, after our experiments are ready to be shared with the real-world, we’ll learn how to set up a production environment.
To get started, we are going to create a directory that will act as the “root“ of your web server, and will be the home to all the work you create in this course.
Download a template for this directory here: psy1903.zip
Unzip the resulting .zip file to yield a directory psy1903. Move this directory to somewhere “permanent” like your Desktop or Documents folder on your computer. Do not leave it in your Downloads folder.
After moving the directory, open it in VSCode and take a moment to familiarize yourself with its contents.

Our development environment will be powered by Node.js, which is a run-time environment that lets us run JavaScript outside the context of a web browser. Using Node.js we can set up a simple web server to run our experiments locally on our computers.
To get started visit https://nodejs.org to download the Node.js installer then run through the setup process using all the default options.

To confirm Node is installed, close and re-open your command line program, then invoke the following command to output your current Node version:
> node -v
To set up a server, we are going to use some existing JavaScript libraries other developers have written. Harnessing existing code libraries is a common practice in programming and it can save you a lot of time when developing projects.
To get these outside libraries, we will use npm, short of Node Package Manager, a utility that came bundled in with our Node.js install. NPM is a dependency manager - it helps us manage outside libraries (aka dependencies) that we’re using within a project.
Via the npm config file package.json, we provide a list of dependencies we want to use:
{
    "name": "psy1903",
    "scripts": {
        "start": "nodemon server.js"
    },
    "dependencies": {
        "express": "^4.19.2",
        "find-free-port": "^2.0.0",
        "path": "^0.12.7",
        "nodemon": "^3.1.4"
    }
}
To download these dependencies, run the following command within the root of your psy1903 directory:
> npm install
Example results (the numbers shown may vary depending on when you run this command):
/Users/Susan/Desktop/psy1903  $ npm install

added 140 packages, and audited 141 packages in 9s

31 packages are looking for funding
  run `npm fund` for details

found 0 vulnerabilities
After completing the above command, you should see a new directory at psy1903/node_modules where all the outside dependencies were downloaded to.
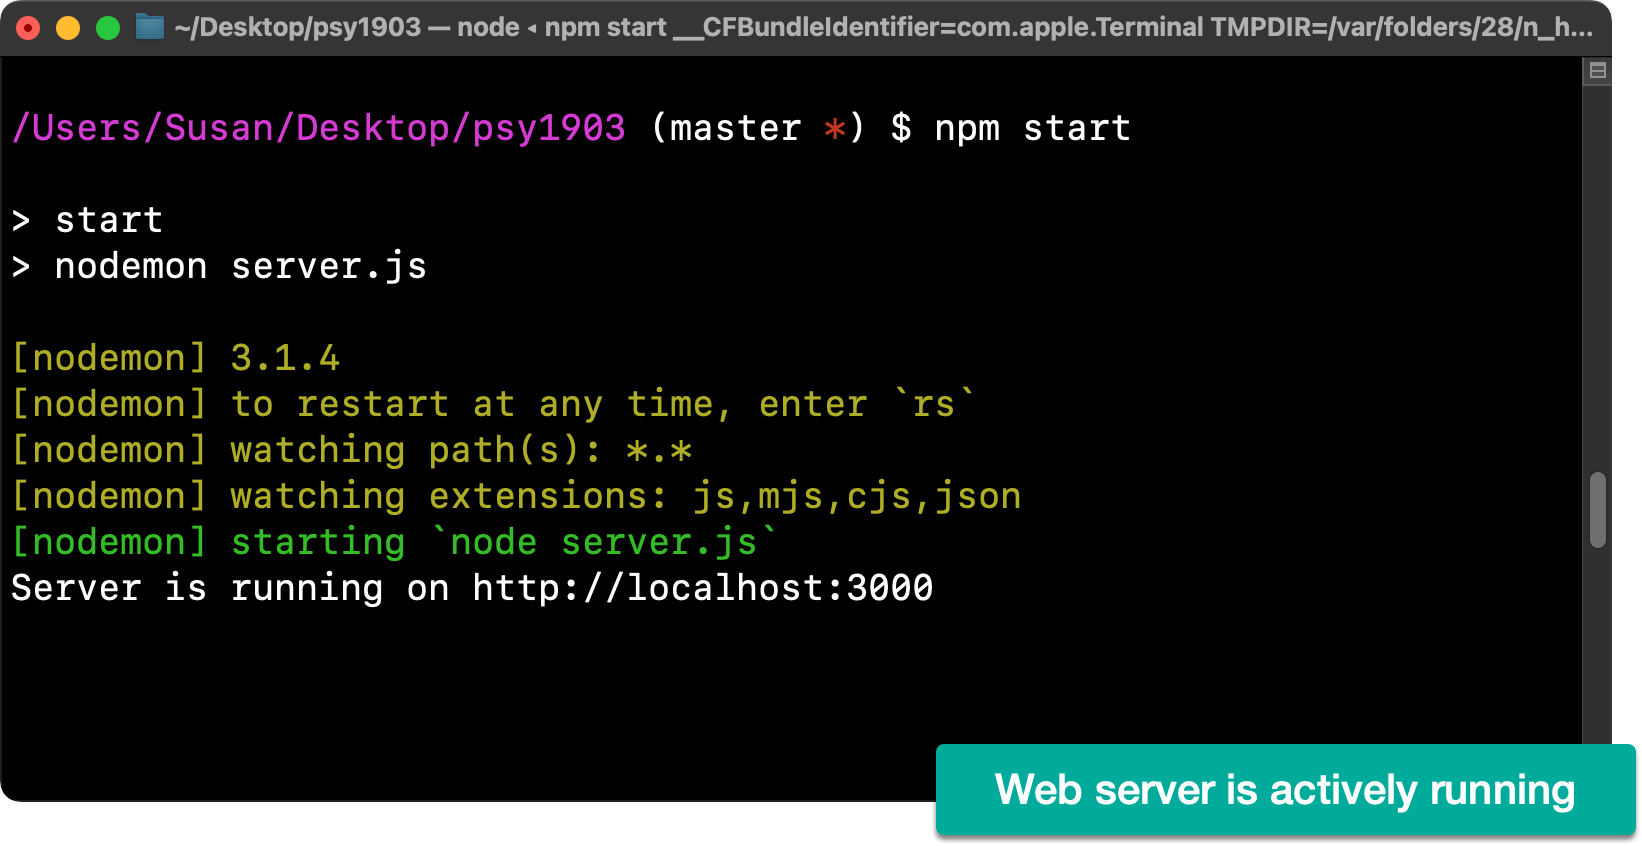
Within your psy1903 directory, run the following command to start your web server:
> npm start
Example results:

From the output above, we see we can access our server/site via the provided URL http://localhost:3000 (the port number of 3000 might vary, so pay attention to whatever output you see).
Load the given URL in your browser where you should see something like this:

If you click the Basics link, it won’t work yet, because we’ll be setting up the files for that link at a later point.
To practice making a change to the files on your server, open psy1903/docs/index.html and update the Projects heading (which is surrounded in the <h1></h1> characters) so it includes your name. E.g.:
Before:
<h1>Projects</h1>
After:
<h1>Susan’s Projects</h1>
After saving your changes, refresh your site in the browser to confirm the change.
The above index.html file is written in HTML, a basic syntax language used to structure web pages. We’ll learn the basics of HTML later when we start building experiments.
Note that after you ran npm start, your server started and stayed actively running in command line. This server program needs to stay running in order for the server to be accessible in the browser.
You can stop the server by running the following keyboard shortcuts:
Once you stop the server, you’ll find it no longer loads in the browser. To restart the server, simply run npm start again.
No subscriptions, no auto-renewals.
Just a simple one-time payment that helps support my free, to-the-point videos without sponsered ads.
Unlocking gets you access to the notes for this video plus all 200+ guides on this site.
Your support is appreciated. Thank you!