In Part 4 of this series on building experiments with PsychoPy, we will build a lexical decision task using the Builder View. This will be the same experiment we created in Part 2 and Part 3 of this series using just code, allowing you to compare/contrast the process of creating experiments in code vs using the Builder.
The following is a summary of the steps completed in the video.
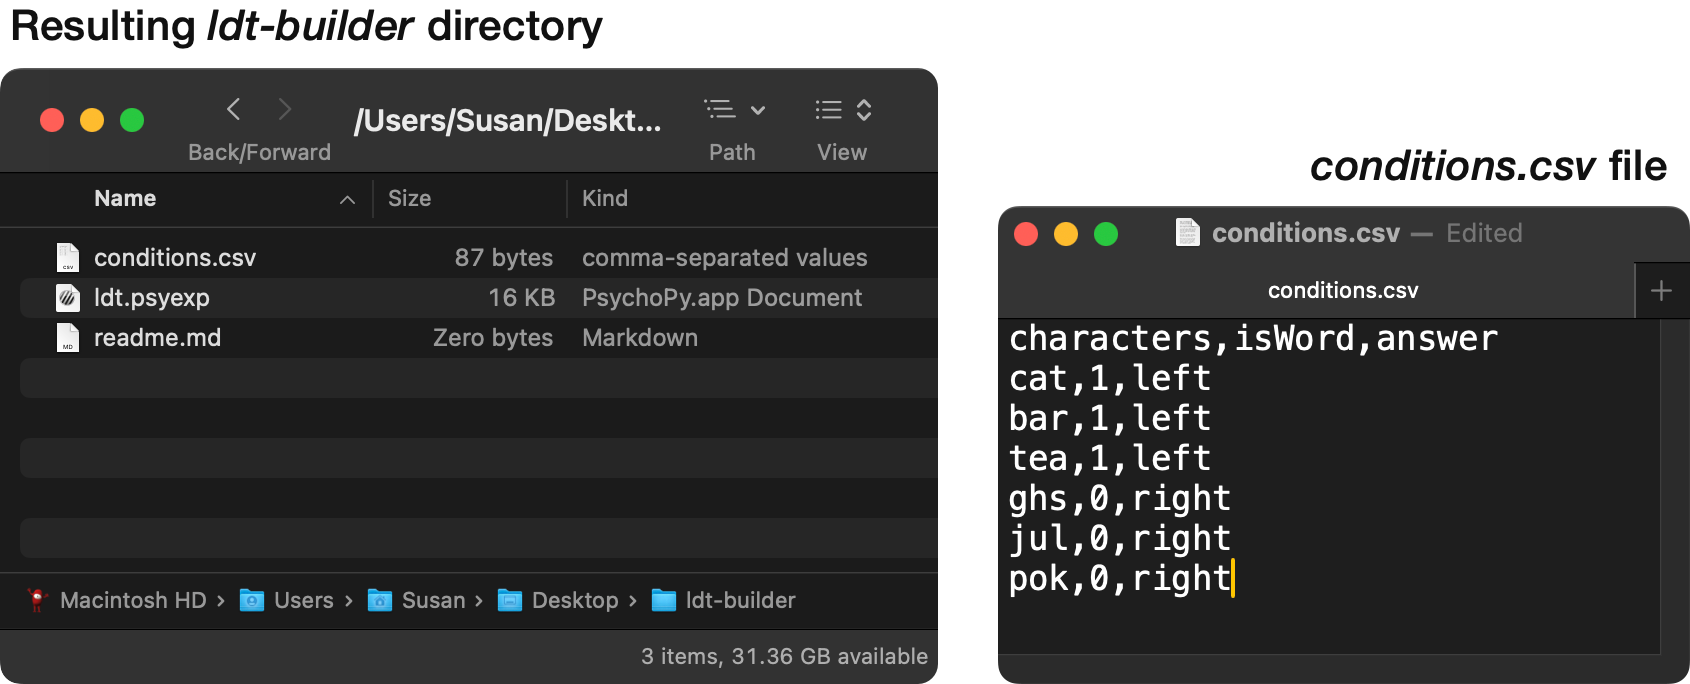
Create a folder on your computer named ldt-builder.
Within this folder, create a text file called conditions.csv with the following data:
characters,isWord,answer
cat,1,right
bar,1,right
tea,1,right
ghs,0,left
jul,0,left
pok,0,left
Create a new experiment in the PsychoPy Builder view. Save the experiment as ldt.psyexp within your ldt-builder folder.
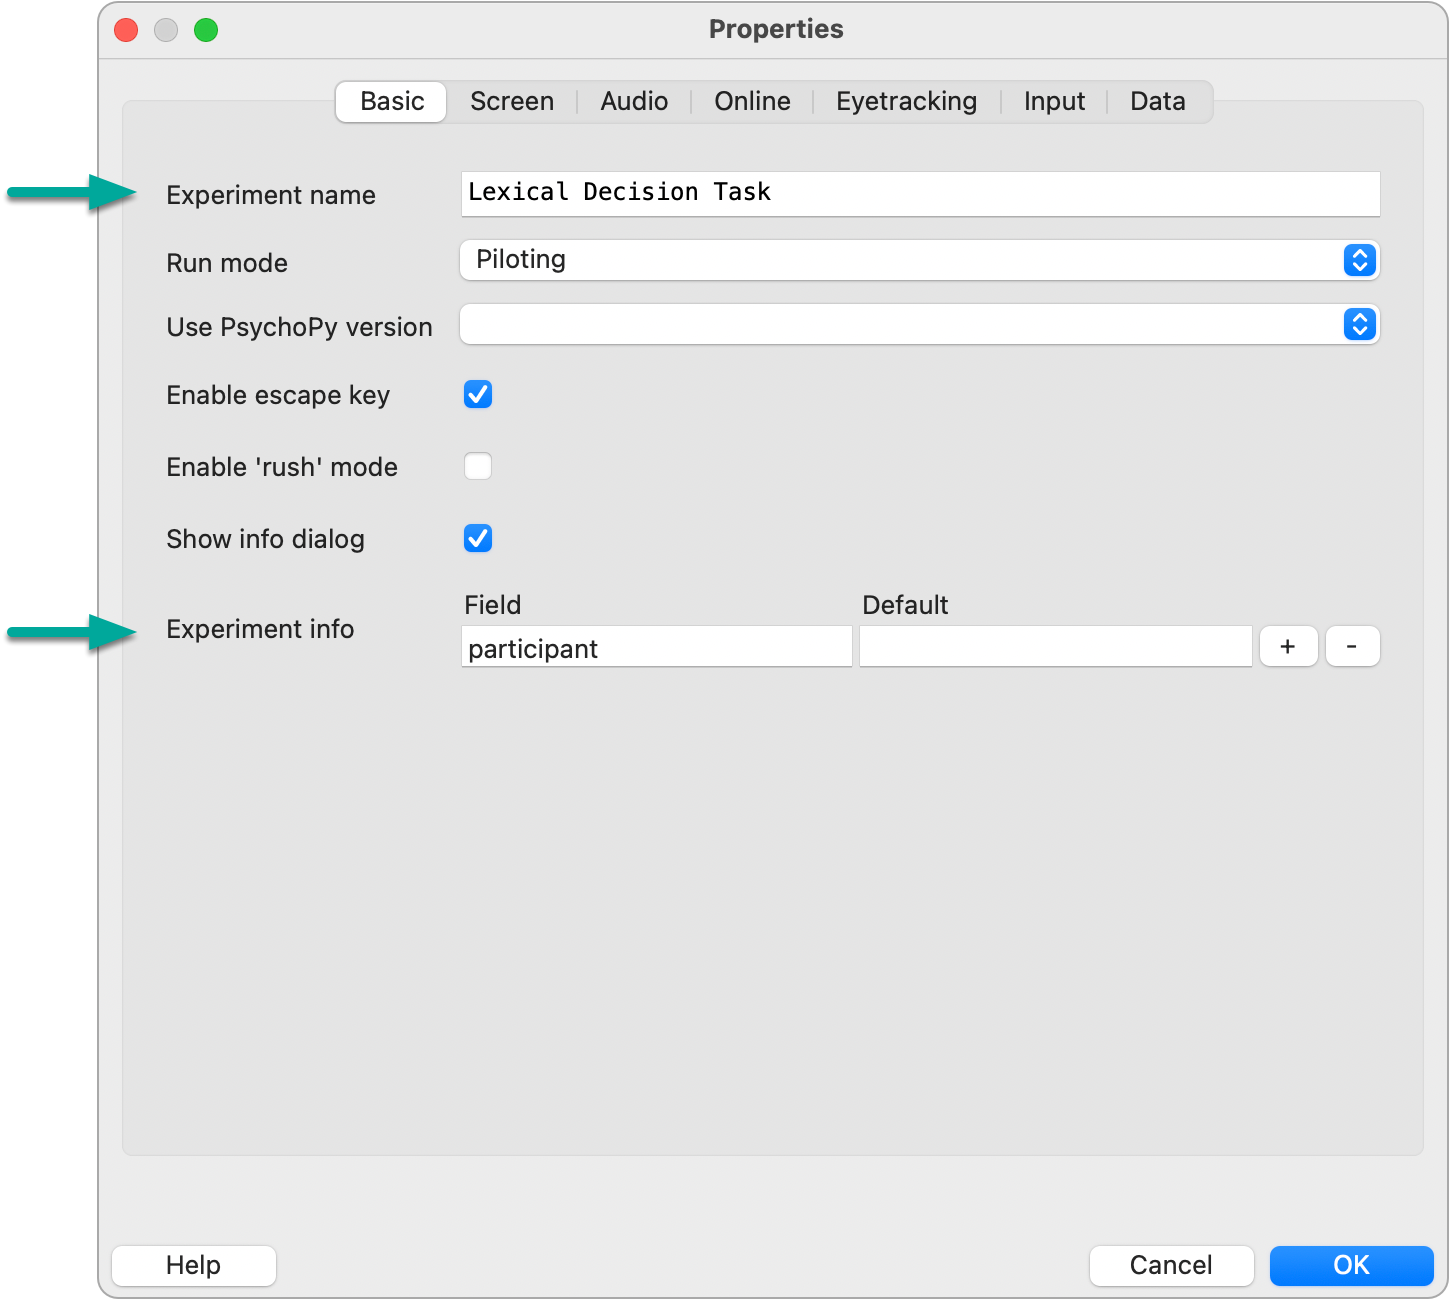
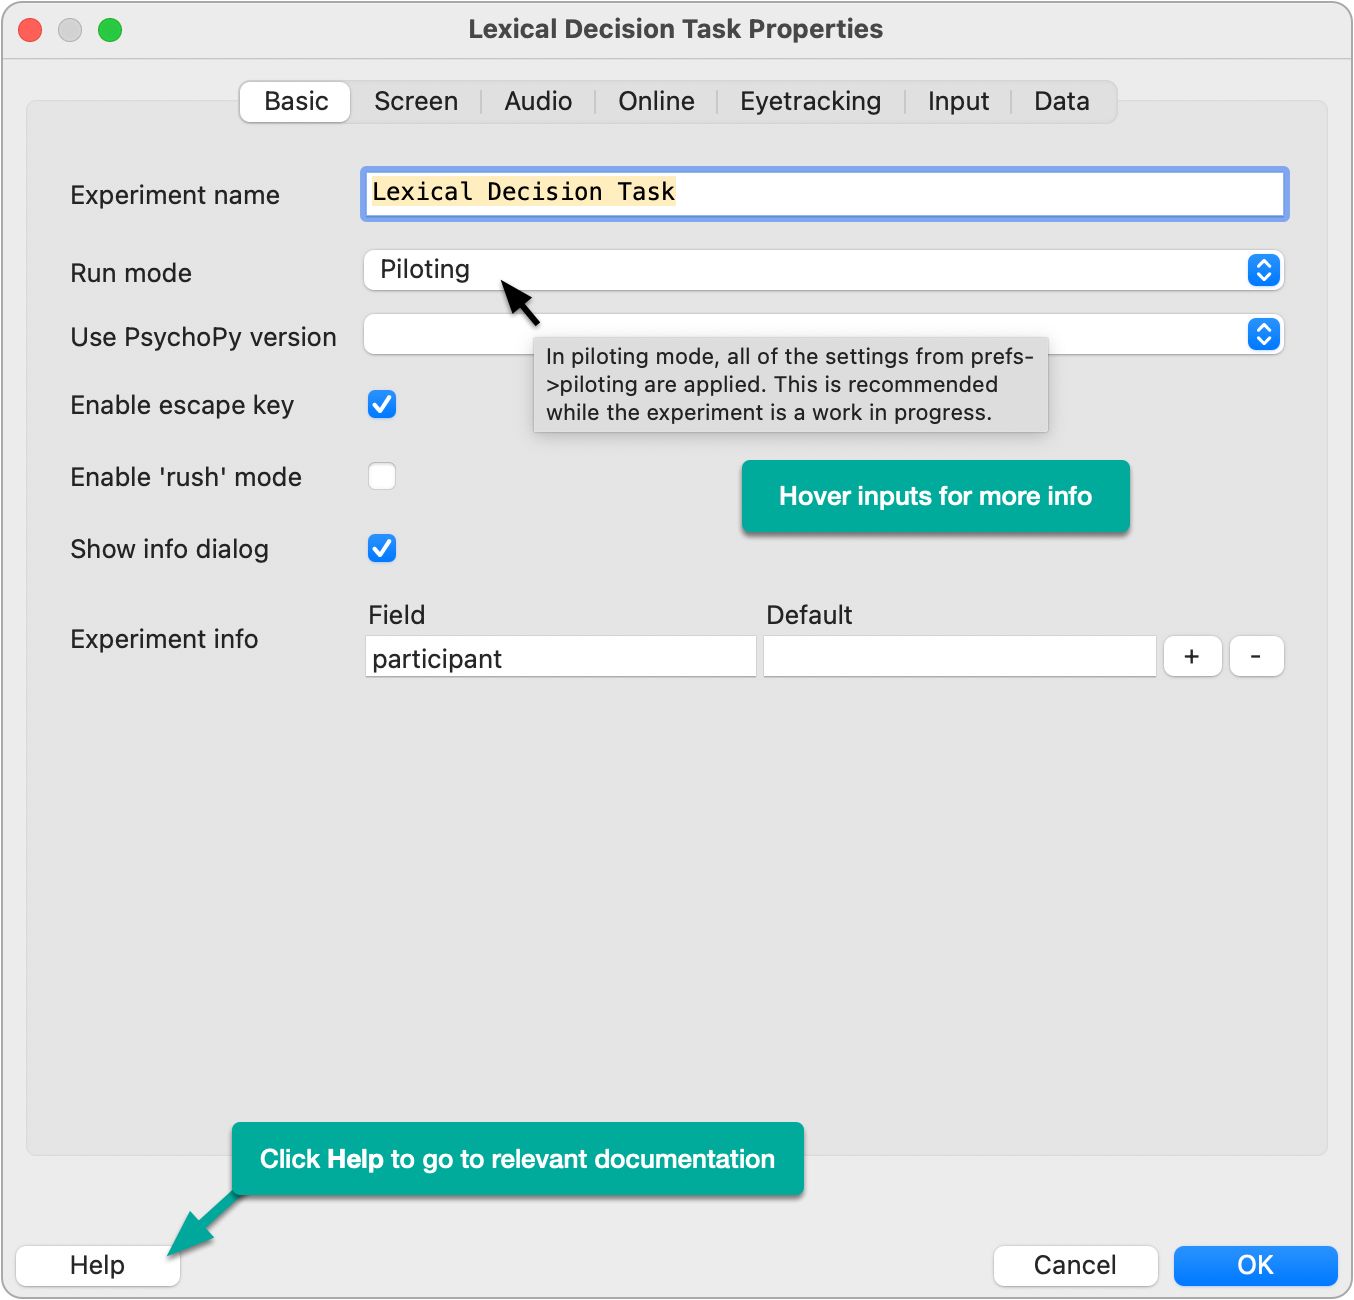
In the experiment properties (accessed via the gear icon) under Basic:
In the experiment properties under Screen:

To find out information about a setting, try hovering over the input for a second. Many settings have info boxes that will appear. Additionally, clicking the Help button on the bottom left will take you to the relevant PsychoPy documentation pages.
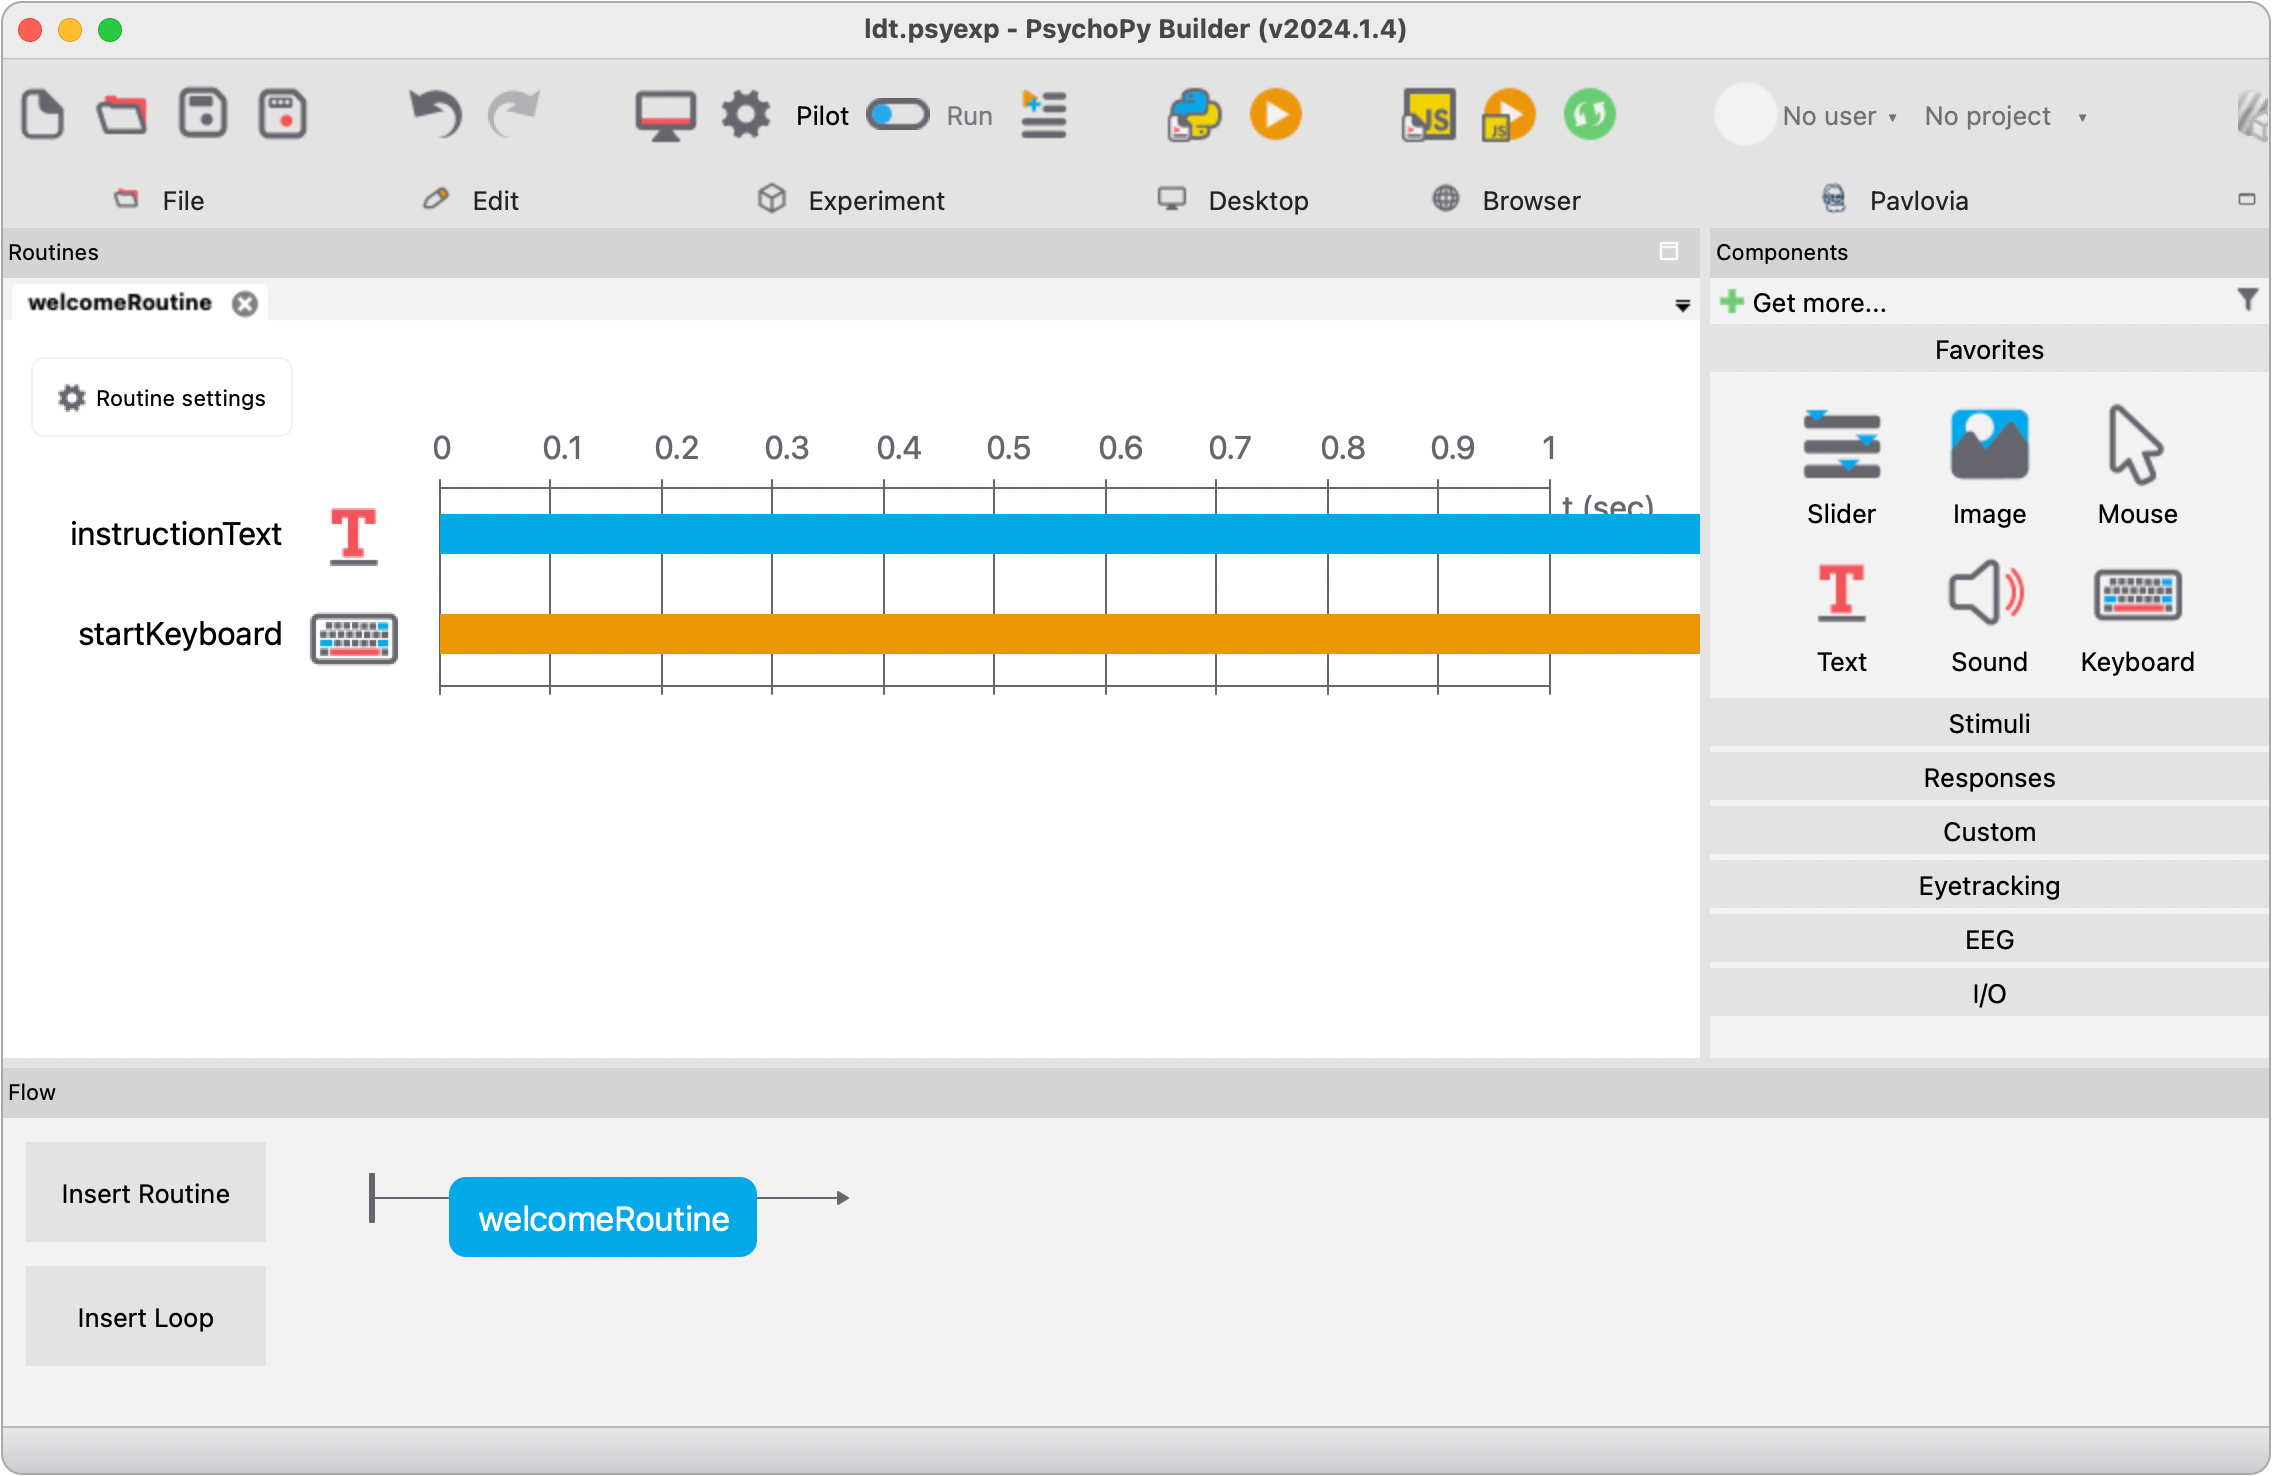
Right click the default routine called trial and choose rename; rename it to welcomeRoutine.
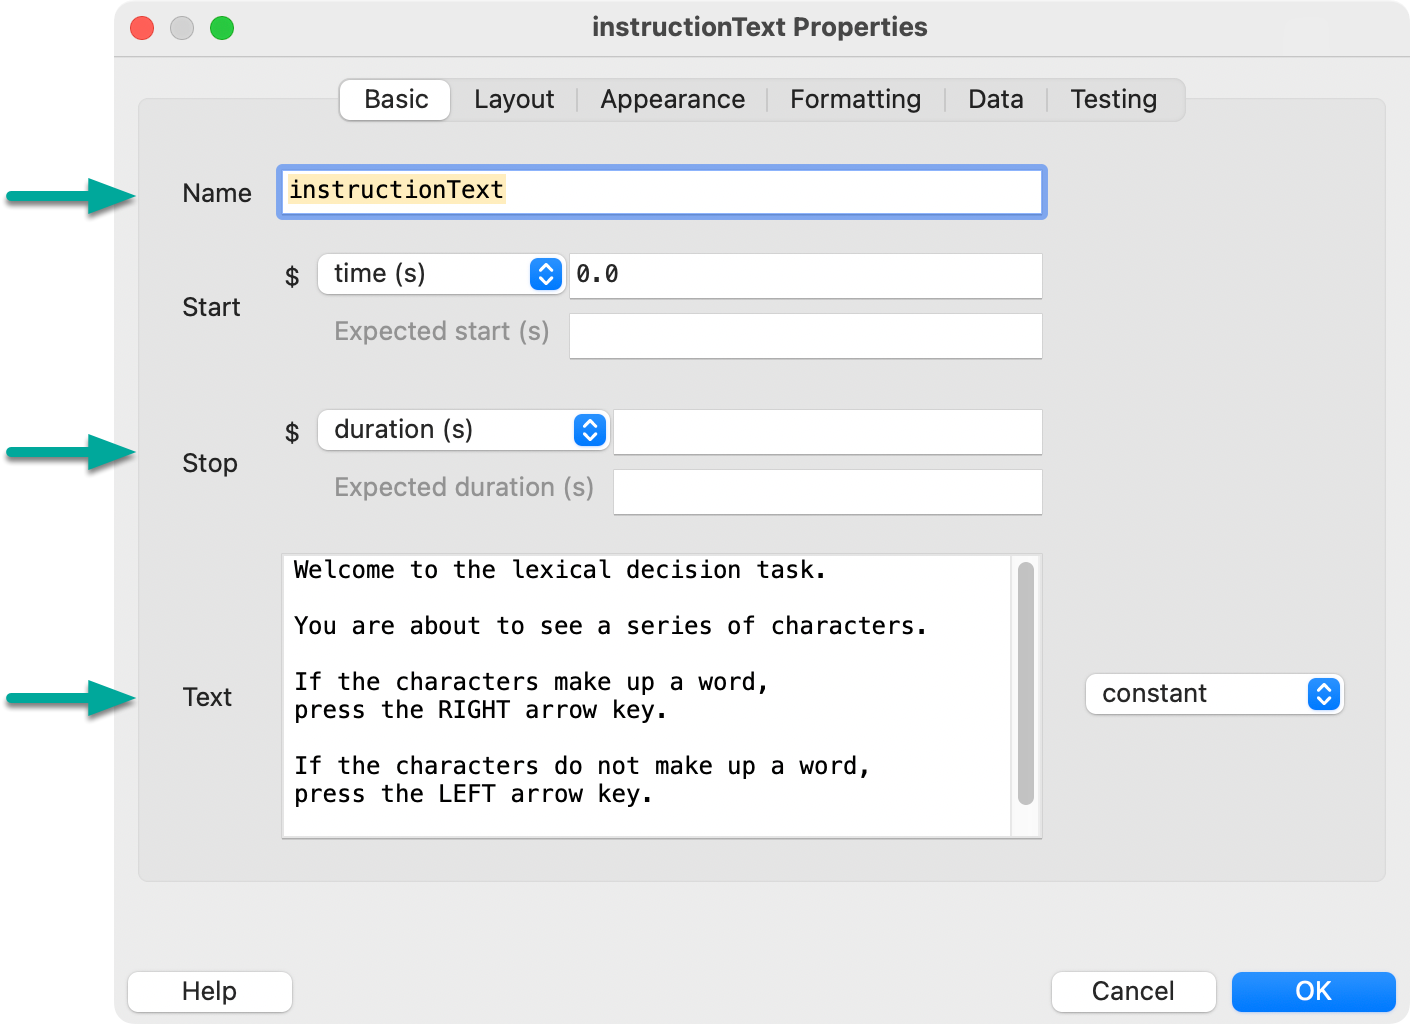
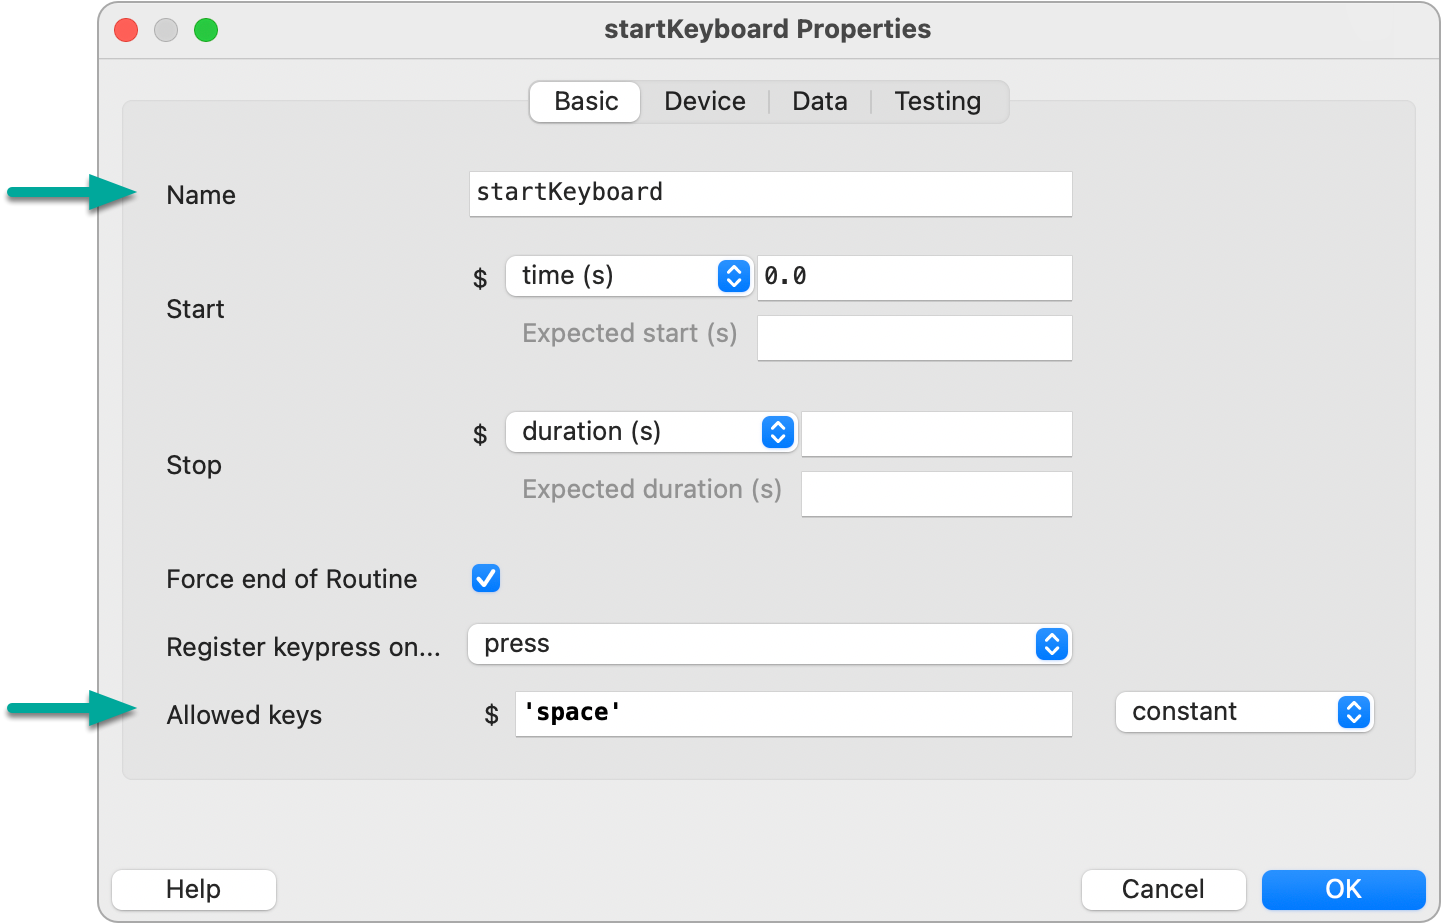
From Components > Favorites click the Text component to add it to the welcome routine.
Welcome to the lexical decision task.

You are about to see a series of characters.

If the characters make up a word,
press the RIGHT arrow key.

If the characters do not make up a word,
press the LEFT arrow key.

Press SPACE to begin.
Next, from Components > Favorites click the Keyboard component to add it to the welcome routine.
After completing the above steps, this is what your experiment should look like:
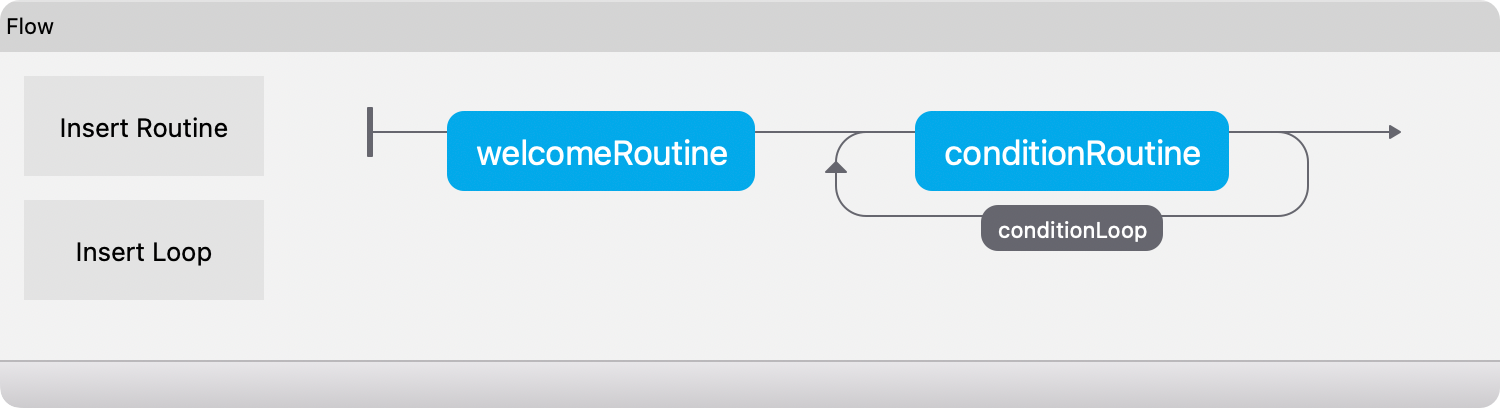
In the Flow pane, click Insert Routine and choose (new)
After completing the above step, your Flow should look like this:

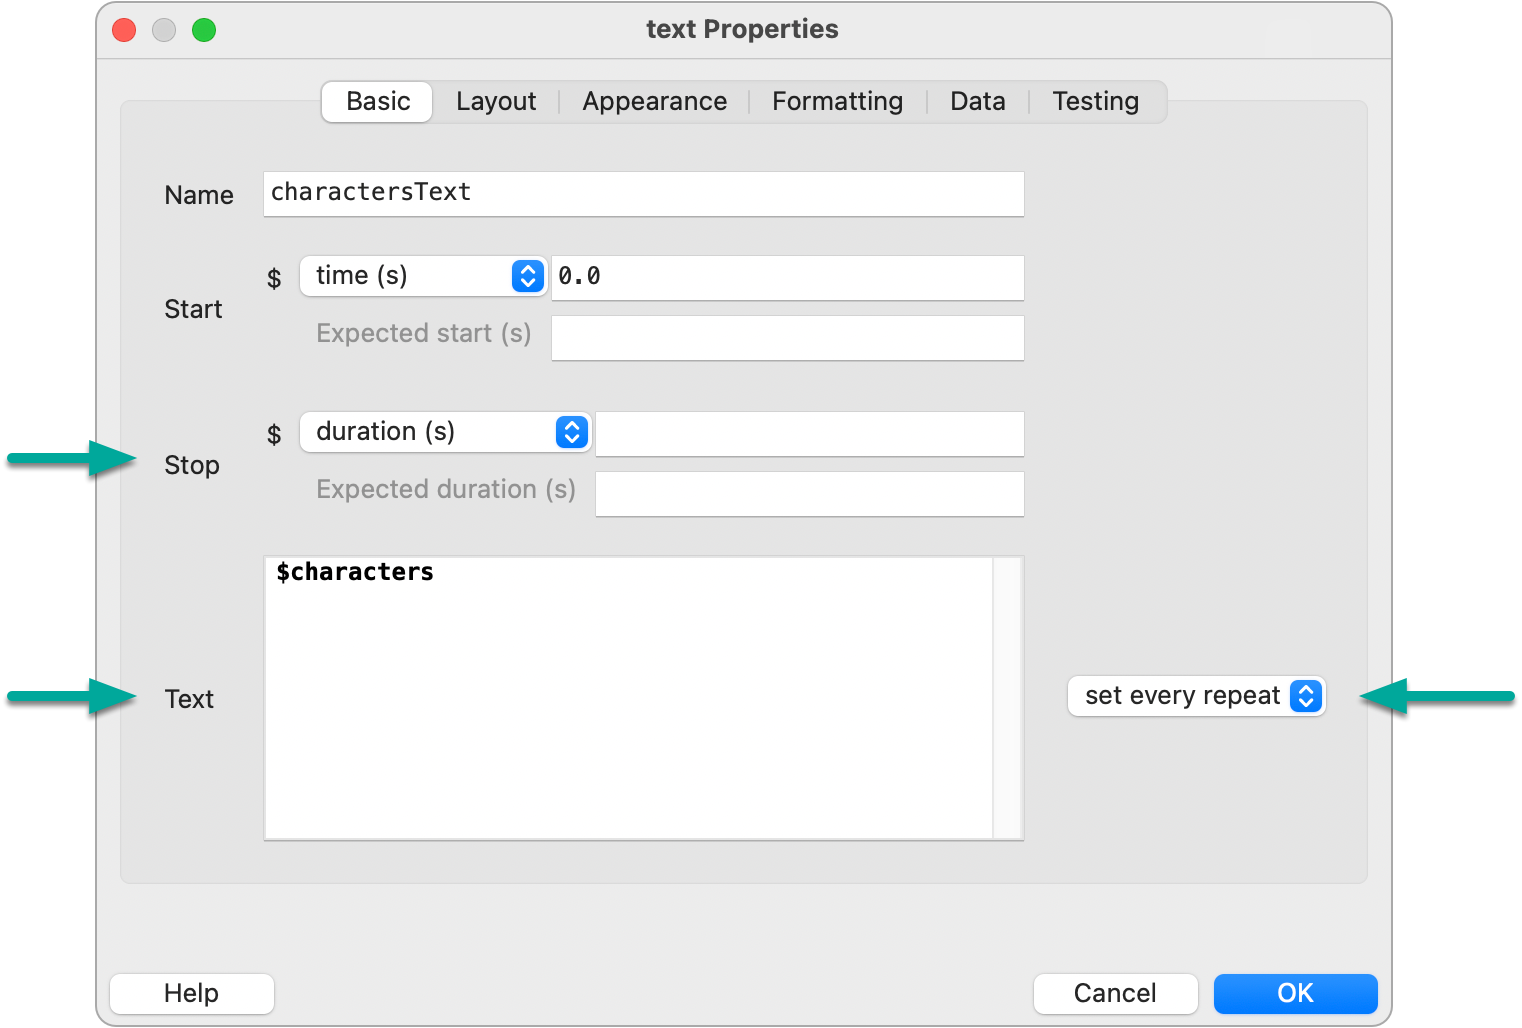
With the conditionRoutine open in the Routines pane, add a new Text component:
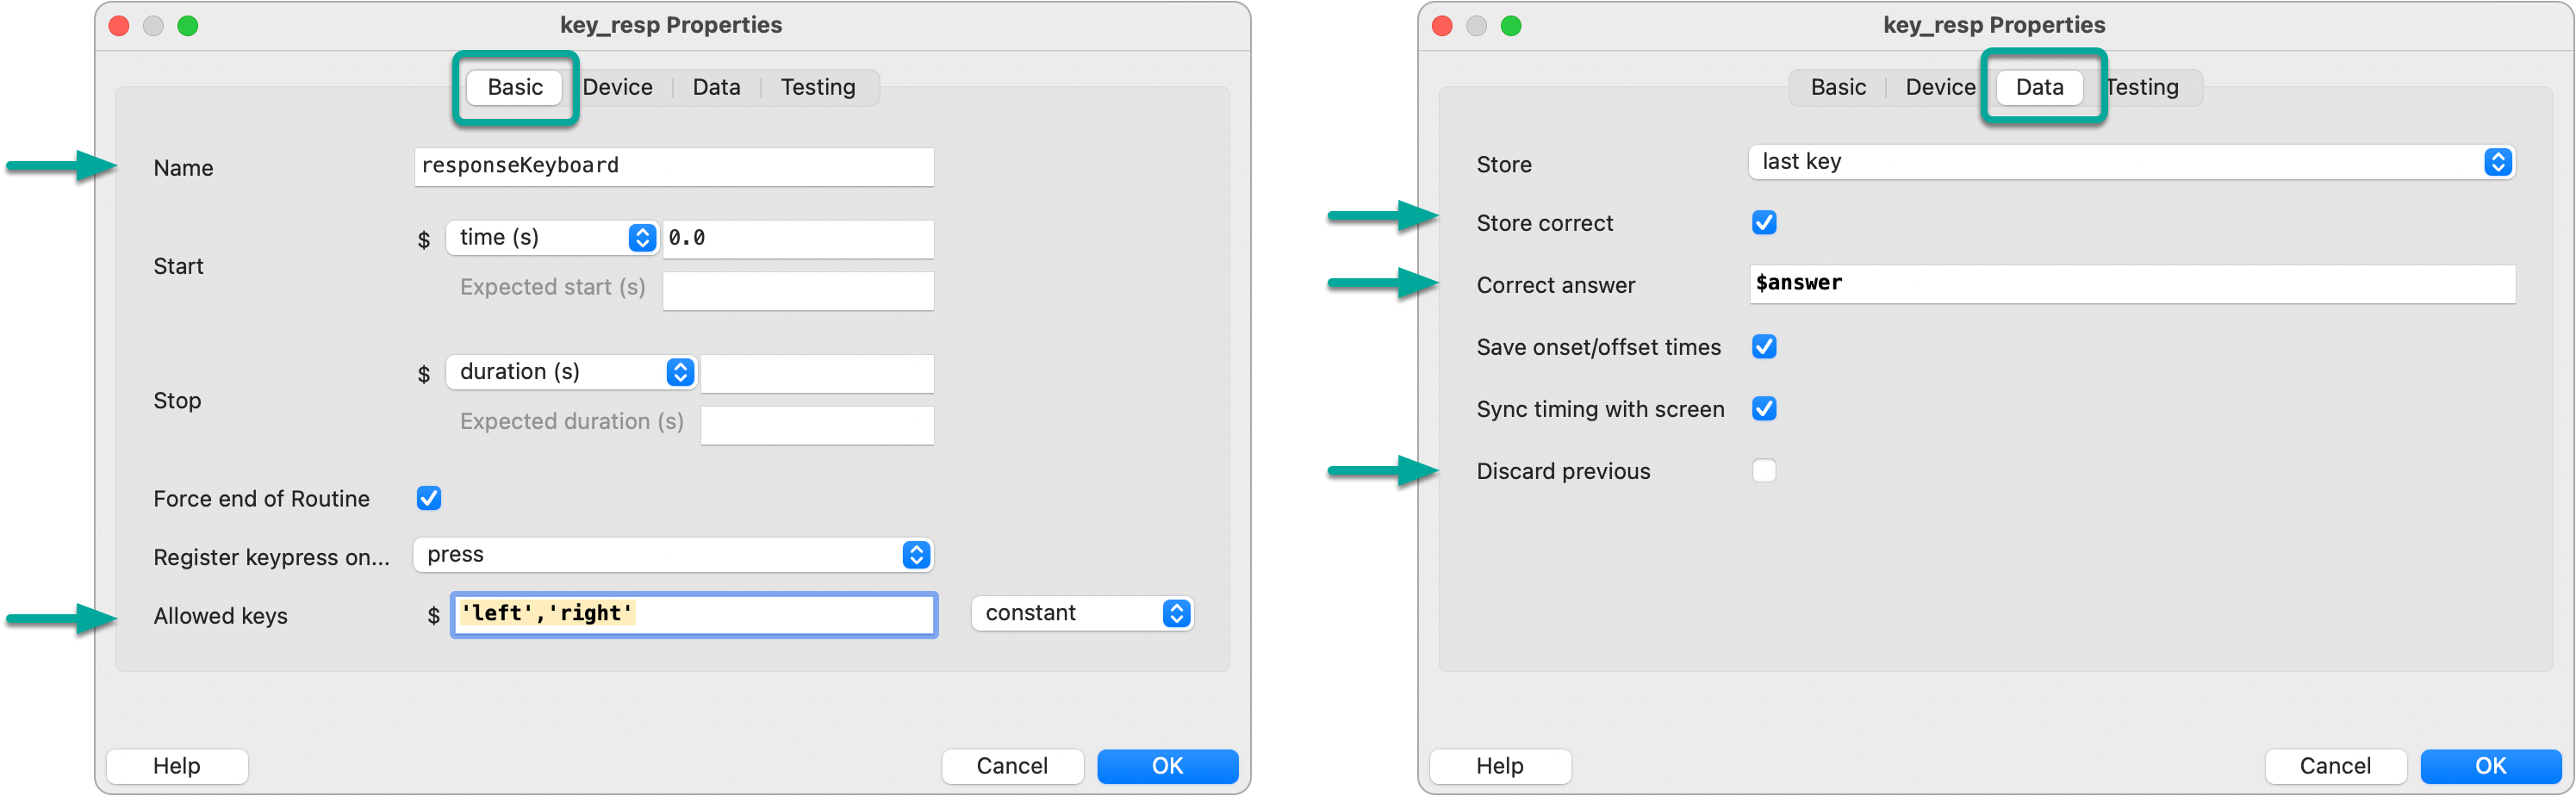
Next, add a new Keyboard component.
Under Basic:
Under Data:
In the Flow pane click Insert Loop.
Click to the left of conditionRoutine to indicate the start of the loop then click to the right of conditionRoutine to indicate the end of the loop.
For the Loop Properties...

The end result should look like this:
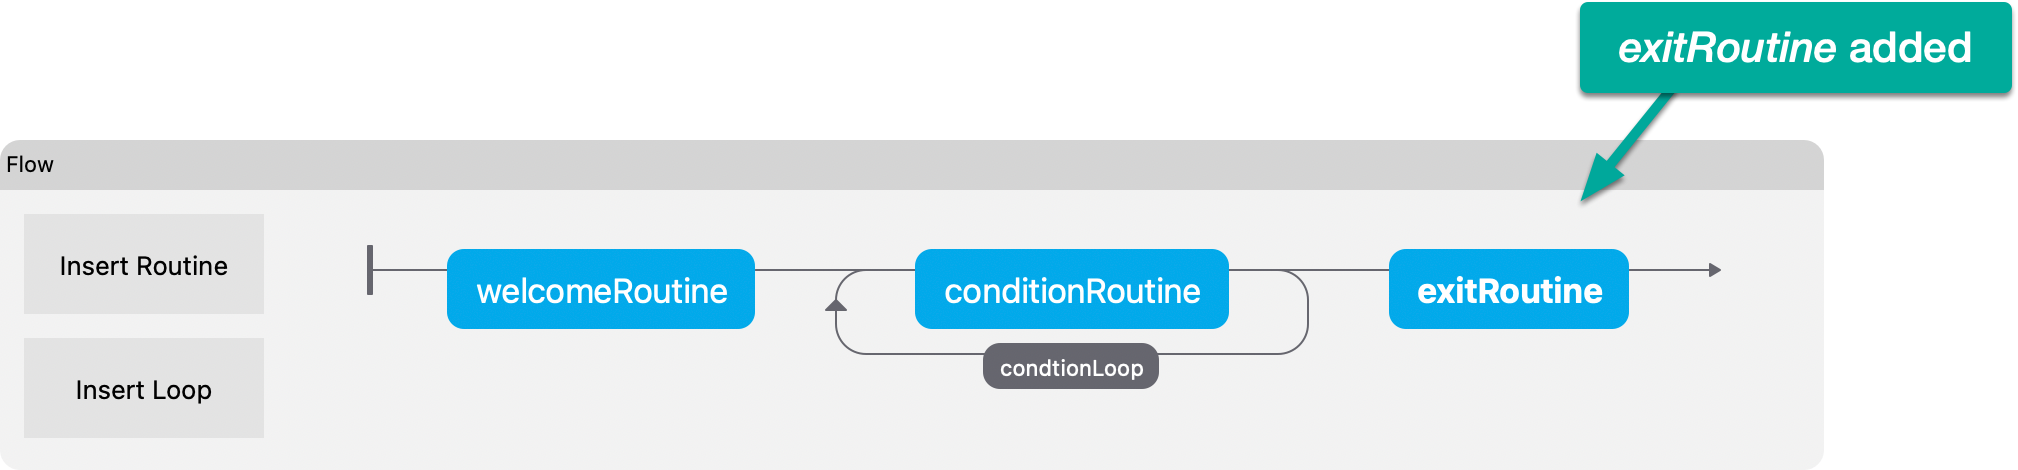
Insert a new routine for the exit screen; name it exitRoutine. Place it after the conditionRoutine.
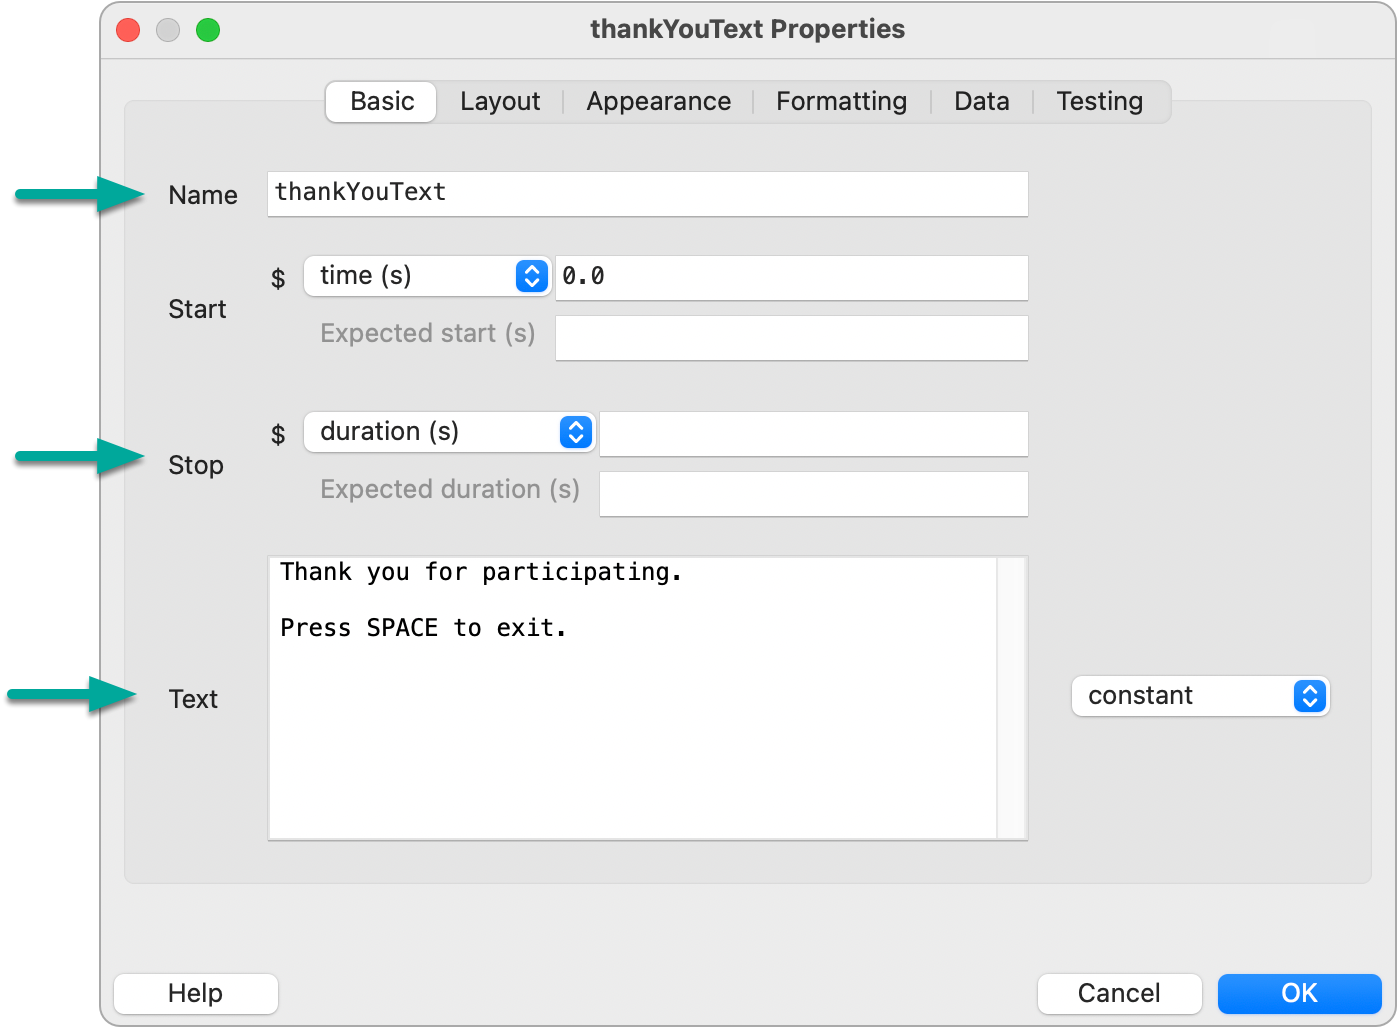
Within the exitRoutine, add a new Text component with the following settings:
Thank you for participating.

Press SPACE to exit.
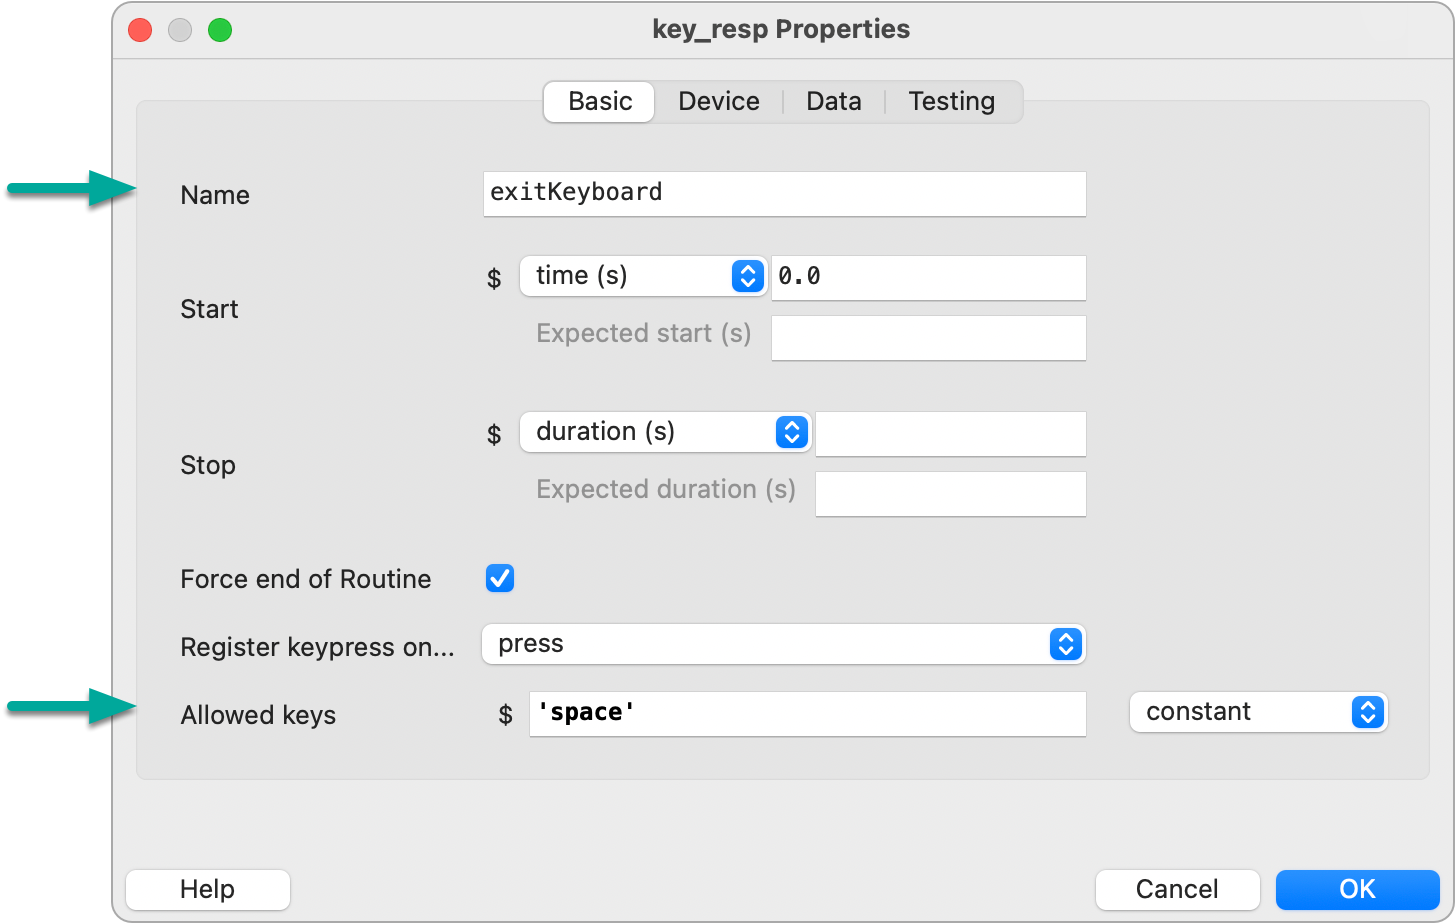
Also within the exit routine, add a new Keyboard component...
To test your experiment, click the play button.
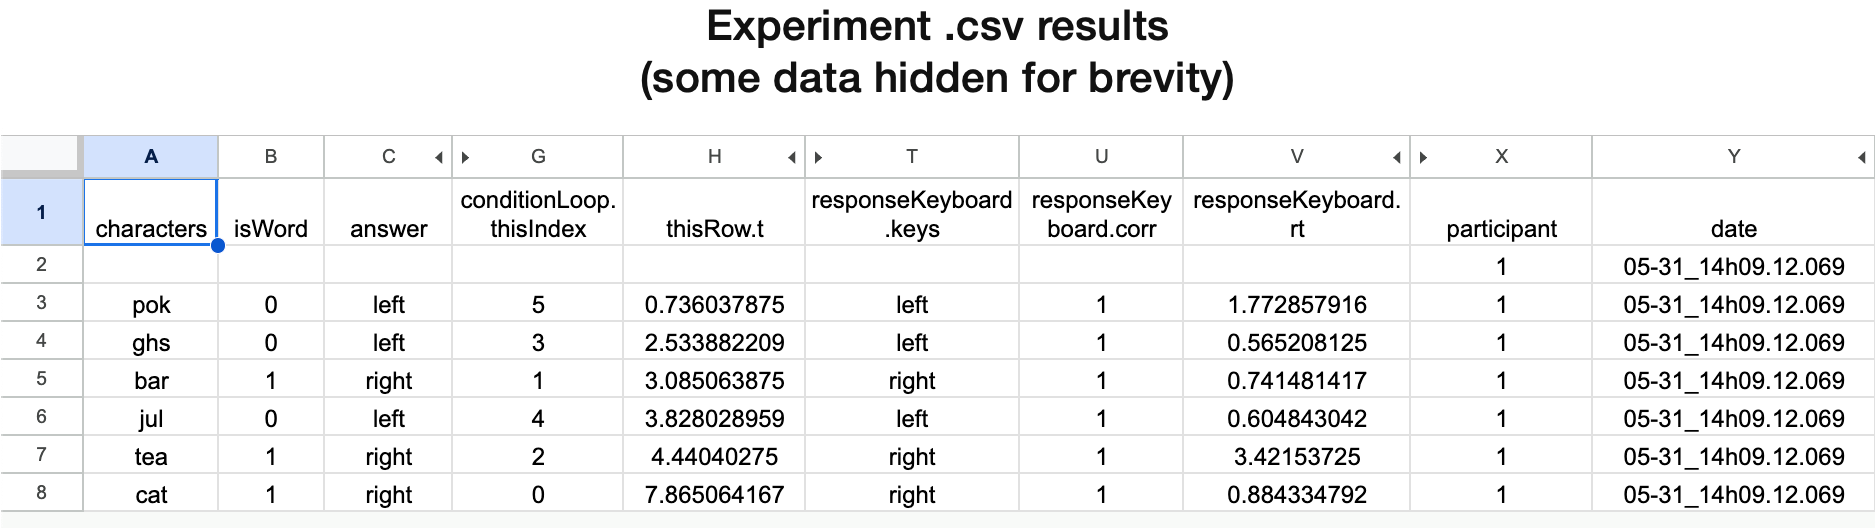
After running the experiment, output files will be generated in a data folder within your ldt-builder project directory.
Within the .csv files in the data folder you can see the resulting data collected from your experiment. Here you can see info about what conditions the participant was shown, what their responses were, and whether or not their response was correct. Example:
No subscriptions, no auto-renewals.
Just a simple one-time payment that helps support my free, to-the-point videos without sponsered ads.
Unlocking gets you access to the notes for this video plus all 200+ guides on this site.
Your support is appreciated. Thank you!