In this guide I’ll show how to self-host your experiments for free on Github Pages and have the data sent to OSF.io (Open Science Foundation). To facilitate the communication with OSF we will use a free service called DataPipe.
Self-hosting experiments provides an alternative to using PsychoPy’s paid-for experiment hosting service, Pavlovia which might be prohibitive if research funding is not available. For more on the discussion of self-hosted vs. Pavlovia experiments, check out these threads: Thread #1 and Thread #2.
If you want to fully self-host your experiments on your own servers, check out my other guide: Run PsychoPy online experiments on your own server
Step 1 - We need to create a OSF security token that will allow our account at DataPipe (to be created in a moment) to communicate with our account at OSF.
Within your OSF.io account, visit Settings > Personal Access Tokens (https://osf.io/settings/tokens) click Create Token and fill in the details as follows:

Copy the resulting token and use it in the following step...
Create a new DataPipe account at https://pipe.jspsych.org.
Once logged in under Account > Settings (https://pipe.jspsych.org/admin/account) click Set OSF Token and paste in the token generated in the previous step.

Returning to your account on OSF, click the Create new project button and fill in the details as appropriate:

Once your project is created, copy/note the project ID which can be found in the URL. E.g. if the URL for your project is https://osf.io/abp6y/, the project ID is abp6y.

Returning to your account on DataPipe click the green Create New Experiment button and fill in the details as follows:

Once the experiment is created, enable data collection and base64 data collection then disable data validation.

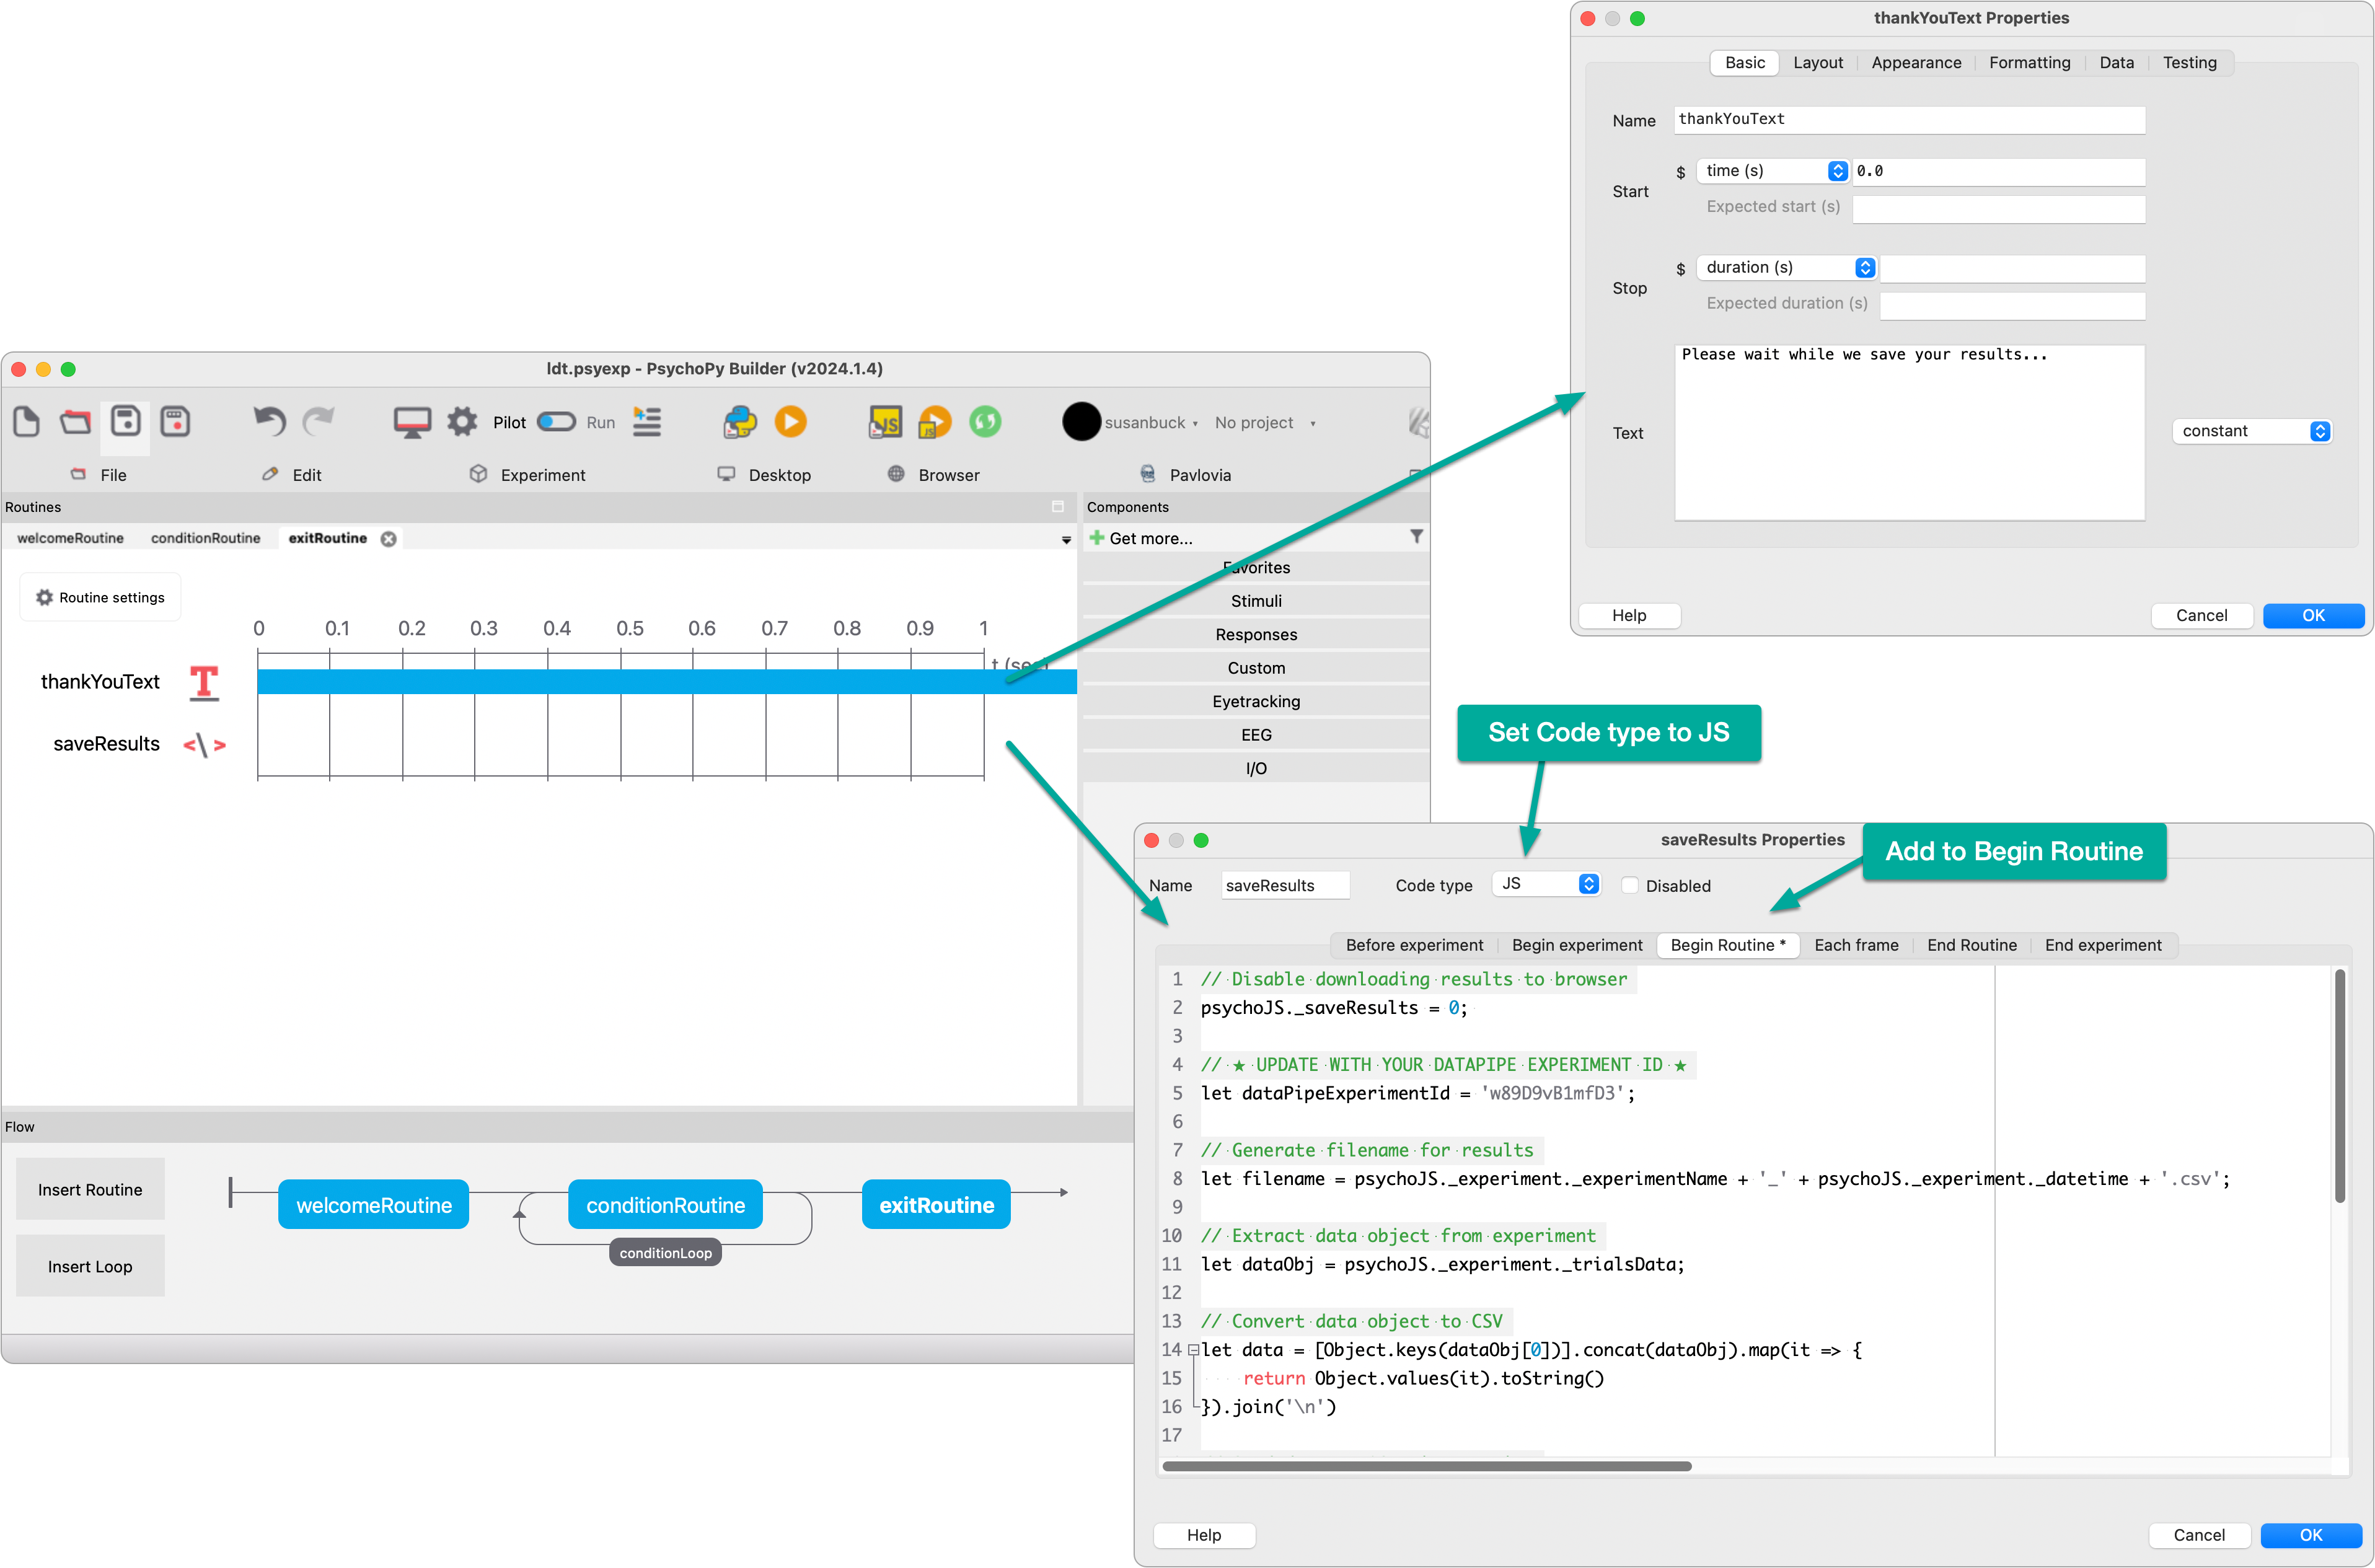
In your experiment, create a exit routine with a text component that says Please wait while we save your results...
In this same routine, add a code component. Set code type to js. Add the following code in the Begin Routine tab; update experimentID with your DataPipe experiment ID.
// Disable downloading results to browser
psychoJS._saveResults = 0;

// Generate filename for results
let filename = psychoJS._experiment._experimentName + '_' + psychoJS._experiment._datetime + '.csv';

// Extract data object from experiment
let dataObj = psychoJS._experiment._trialsData;

// Convert data object to CSV
let data = [Object.keys(dataObj[0])].concat(dataObj).map(it => {
    return Object.values(it).toString()
}).join('\n')

// Send data to OSF via DataPipe
console.log('Saving data...');
fetch('https://pipe.jspsych.org/api/data', {
    method: 'POST',
    headers: {
        'Content-Type': 'application/json',
        Accept: '*/*',
    },
    body: JSON.stringify({
        experimentID: 'XXXXXXXXXXXX', // ⭑ UPDATE WITH YOUR DATAPIPE EXPERIMENT ID ⭑
        filename: filename,
        data: data,
    }),
}).then(response => response.json()).then(data => {
    // Log response and force experiment end
    console.log(data);
    quitPsychoJS();
})
Resulting routine:
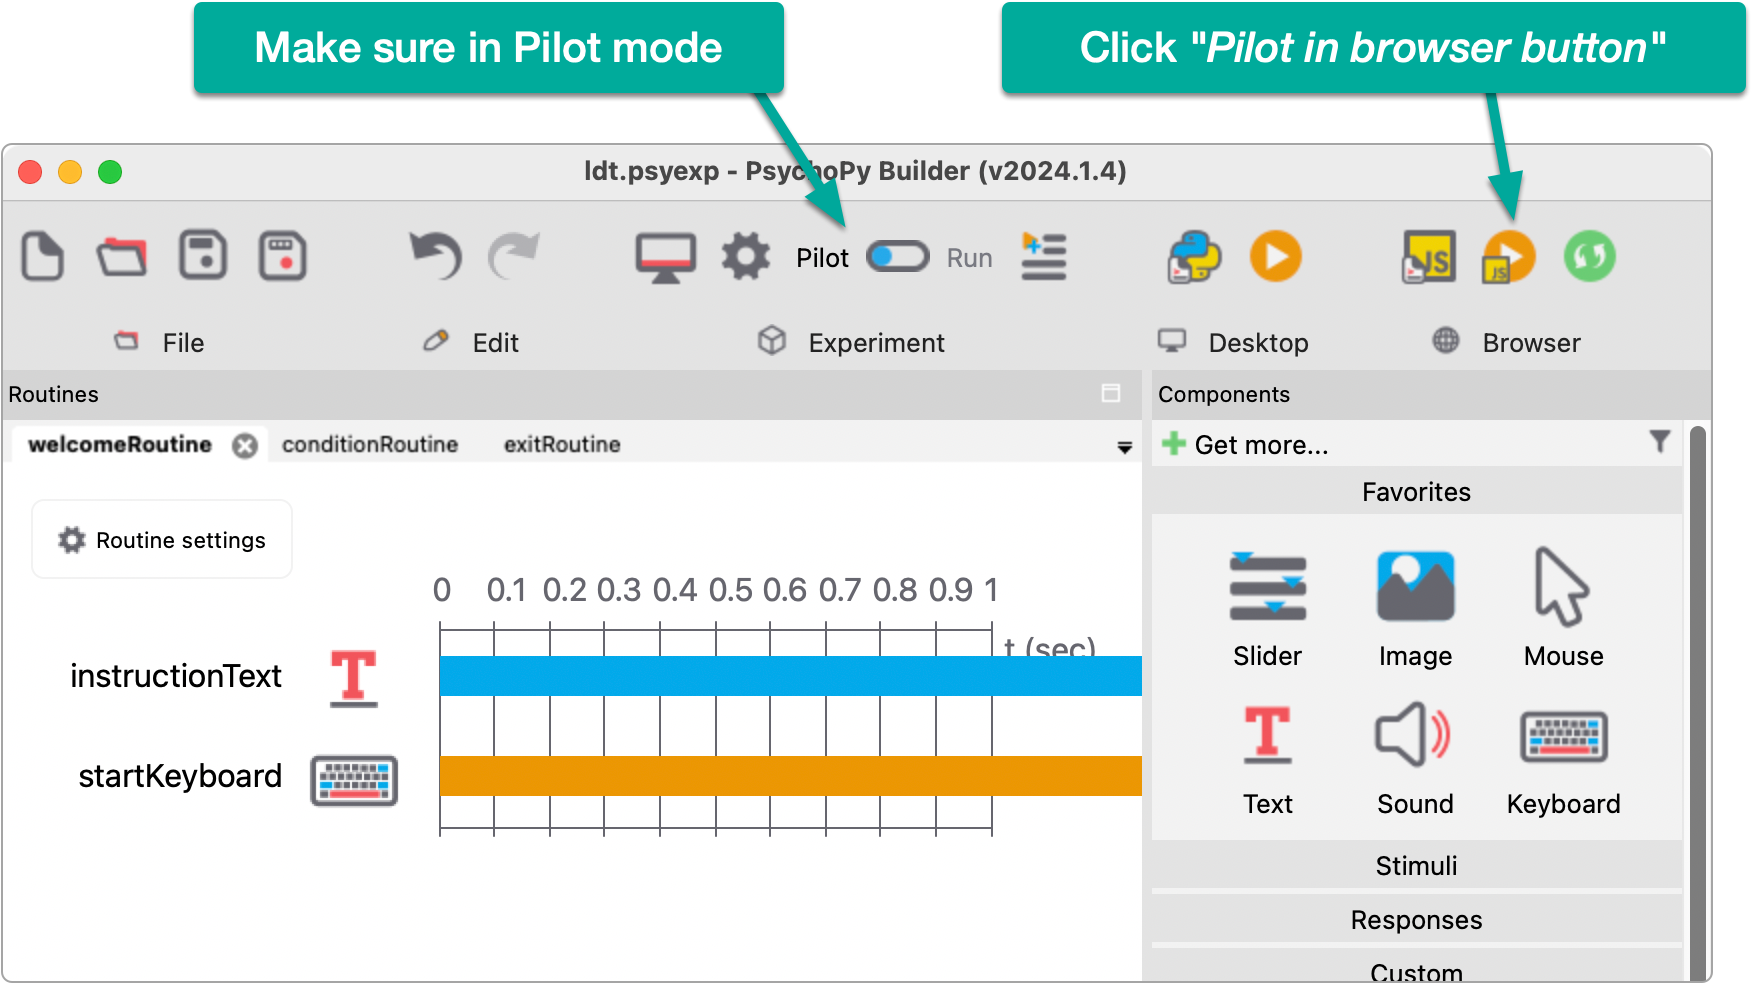
With PsychoPy Builder in Pilot mode, click the Pilot in browser button:
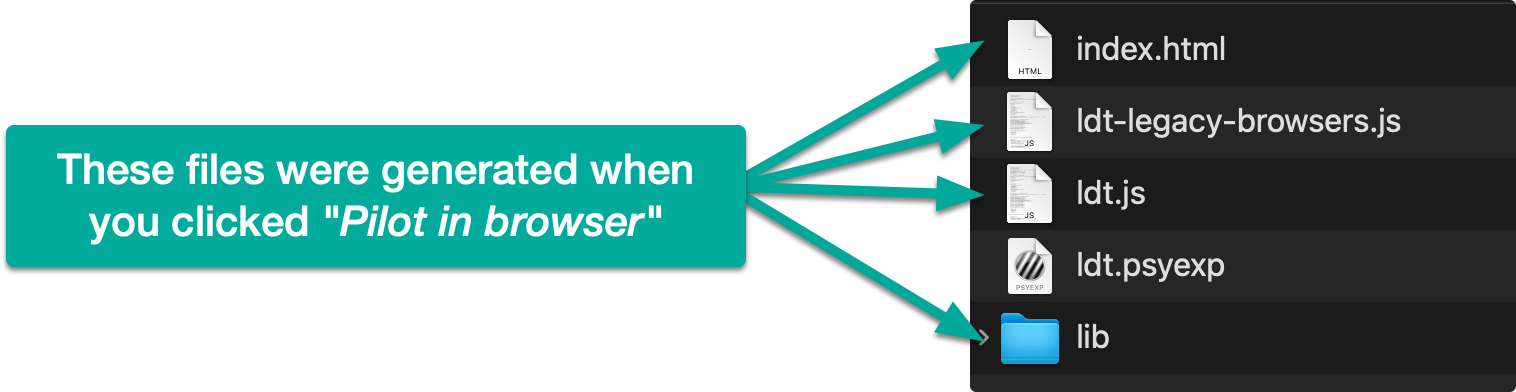
This will translate your experiment to PsychoJS and generate all the necessary web files that will be used to run the experiment in the browser. The generated files can be found in the directory where your experiment exists.
For my example, I have an experiment called ldt.psyexp (where ldt = Lexical Decision Task) and after building for the web, you can see the new web-related files added to my project directory:
Our next step is to get the above files uploaded to a new repository on Github.com.
You can complete these steps using any Git workflow, or, if you don’t have Git experience, you can use Github.com’s upload feature to upload your experiment files via the web browser, which is the process I will show.
To get started, visit https://github.com/new and create a new repository. When creating the repository, check the option to Add a README.md file. Example:

Append /upload to the end of your repository URL (e.g. https://github.com/susanBuck/ldt/upload) to access Github’s upload feature.
Drag and drop your experiment files generated in the above step to upload them. In my example that includes these files:
Click Commit changes to persist your upload.

Your experiment files are now stored on Github, but to make them publicly accessible and operational as a website we need to enable Github Pages.
To do this, in your repository Settings under Pages, set the Branch to main and folder to / (root). This tells Github that you wish to serve any files on the main branch in the root of this repository as a Github Pages site. By default, the file called index.html will be served as the homepage for the site.

Saving these changes will prompt your new Github Pages site to deploy for the first time. You can check the progress by visiting the Actions dashboard:

Once the deployment action is complete you should be able to access your experiment via the URL pattern https://username.github.io/repo-name; for example, my experiment is available via https://susanbuck.github.io/ldt/.
Run through your experiment confirming it works as expected. When you’re done, visit your project on OSF.io and look for the uploaded data.

No subscriptions, no auto-renewals.
Just a simple one-time payment that helps support my free, to-the-point videos without sponsered ads.
Unlocking gets you access to the notes for this video plus all 200+ guides on this site.
Your support is appreciated. Thank you!
 PsychoPy - Manual install via Conda (PsychoPy in VSCode)
 Builder View (lexical decision task)
 Overview