In this guide I’ll go through troubleshooting steps for when you attempt to SSH into a remote server/system using SSH keys as your authentication method and it fails with the error Permission denied (publickey).

For this example, I will troubleshoot a failed connection between my computer and a remote web server, but these same principles can be applied in different contexts (e.g. connecting between two different remote servers).
This guide assumes you have already gone through the steps of setting up SSH keys, but they’re just not working. If you haven’t already set up your keys, start here: Creating a SSH key connection with a server.
To begin troubleshooting, first move into the ~/.ssh directory on your computer. Within this directory, you should see two text files corresponding to the key pair you generated when setting up your SSH keys.
For example, in my guide Creating a SSH key connection with a server I created a key pair called susans-macbook so I see two files:
susans-macbook (with no extension - this is the private key)susans-macbook.pub (with the .pub extension - this is the public key that should be installed on the server I'm connecting to)
To confirm the private and public keys are a match, I can run the following command to examine the private key and see what the contents of the corresponding public key should be:
> ssh-keygen -y -e -f susans-macbook
I can then output the contents of the public key (susans-macbook.pub) to make sure it’s a match:
> cat susans-macbook.pub
Example:
/Users/Susan/.ssh  > ssh-keygen -y -e -f susans-macbook
---- BEGIN SSH2 PUBLIC KEY ----
Comment: "3072-bit RSA, converted by Susan@Susan-Bucks-MacBook-Pro-202"
AAAAB3NzaC1yc2EAAAADAQABAAABgQC62Z4Hr+/UPeBhuIAOe9oPSROFvL5XOs7ZBUqPAn
8oHSbyn/6CrN5Pl+6grTfF1oJzrTQ9mC75i5jknCiTSQelE79JeyDPrJrGTnt5HHQb3pKn
APaTbJ+zuWJlmR9RasD1LuJM6wLzY3G5w6+SHcMv6MVmBDXLUZh9F39wTBMYScXzWN1K+n
9tCk4D1FN9zSZ/L71mL7+U+jMqBXHCrjw4rkZycLzH/PfApfkFlFvYljTEeD6gFZW17VCT
DrBOajUPQmYggfkj1/YFAiCkcEhKkWP9qkrB1rX288N7fLr9wiE5NccCJqTEfF6CR8GzpY
M5MO0O/XPffb+Gb3faiTjt8OX/i/zhE6qyIIJtUqcy++96+ibZLefQKB0CM8Gh7Dt0Uh/m
b8IylxAb1s8OLO3HPYbeqBtg28EufuoqTDrg5QDF9bi6YL8G4tUjC8tmDiB0ffNdnVvBpz
+NIcIjmDEUO41Rv8G8/GadzBfM5yxv4Fo+Q2qc5PWi+HSDe8tAF6k=
---- END SSH2 PUBLIC KEY ----
/Users/Susan/.ssh  > cat susans-macbook.pub
ssh-rsa AAAAB3NzaC1yc2EAAAADAQABAAABgQC62Z4Hr+/UPeBhuIAOe9oPSROFvL5XOs7ZBUqPAn8oHSbyn/6CrN5Pl+6grTfF1oJzrTQ9mC75i5jknCiTSQelE79JeyDPrJrGTnt5HHQb3pKnAPaTbJ+zuWJlmR9RasD1LuJM6wLzY3G5w6+SHcMv6MVmBDXLUZh9F39wTBMYScXzWN1K+n9tCk4D1FN9zSZ/L71mL7+U+jMqBXHCrjw4rkZycLzH/PfApfkFlFvYljTEeD6gFZW17VCTDrBOajUPQmYggfkj1/YFAiCkcEhKkWP9qkrB1rX288N7fLr9wiE5NccCJqTEfF6CR8GzpYM5MO0O/XPffb+Gb3faiTjt8OX/i/zhE6qyIIJtUqcy++96+ibZLefQKB0CM8Gh7Dt0Uh/mb8IylxAb1s8OLO3HPYbeqBtg28EufuoqTDrg5QDF9bi6YL8G4tUjC8tmDiB0ffNdnVvBpz+NIcIjmDEUO41Rv8G8/GadzBfM5yxv4Fo+Q2qc5PWi+HSDe8tAF6k= Susans-MacBook
If your keys don’t match for some reason, I suggest deleting them to start over with a new key pair (instructions here: Creating a SSH key connection with a server).
When generating SSH keys you have the option to generate the keys using a default name of id_rsa or you can use a custom key name as I did in the above example (susans-macbook).
If you use a custom key name, you have to edit your computer’s SSH config file instructing it to use this key when attempting a SSH connection. To double check this was done correctly open the file ~/.ssh/config and make sure it has a line like the following (replace susans-macbook with the key name you’re using):
IdentityFile ~/.ssh/susans-macbook

To confirm your key is being used, you can initiate the SSH connection adding the -v verbose flag which will output extra debugging information including a list of keys that were used when attempting the connection:
> ssh -v username@ip-address
Here’s an example showing that my susans-macbook key is being used:
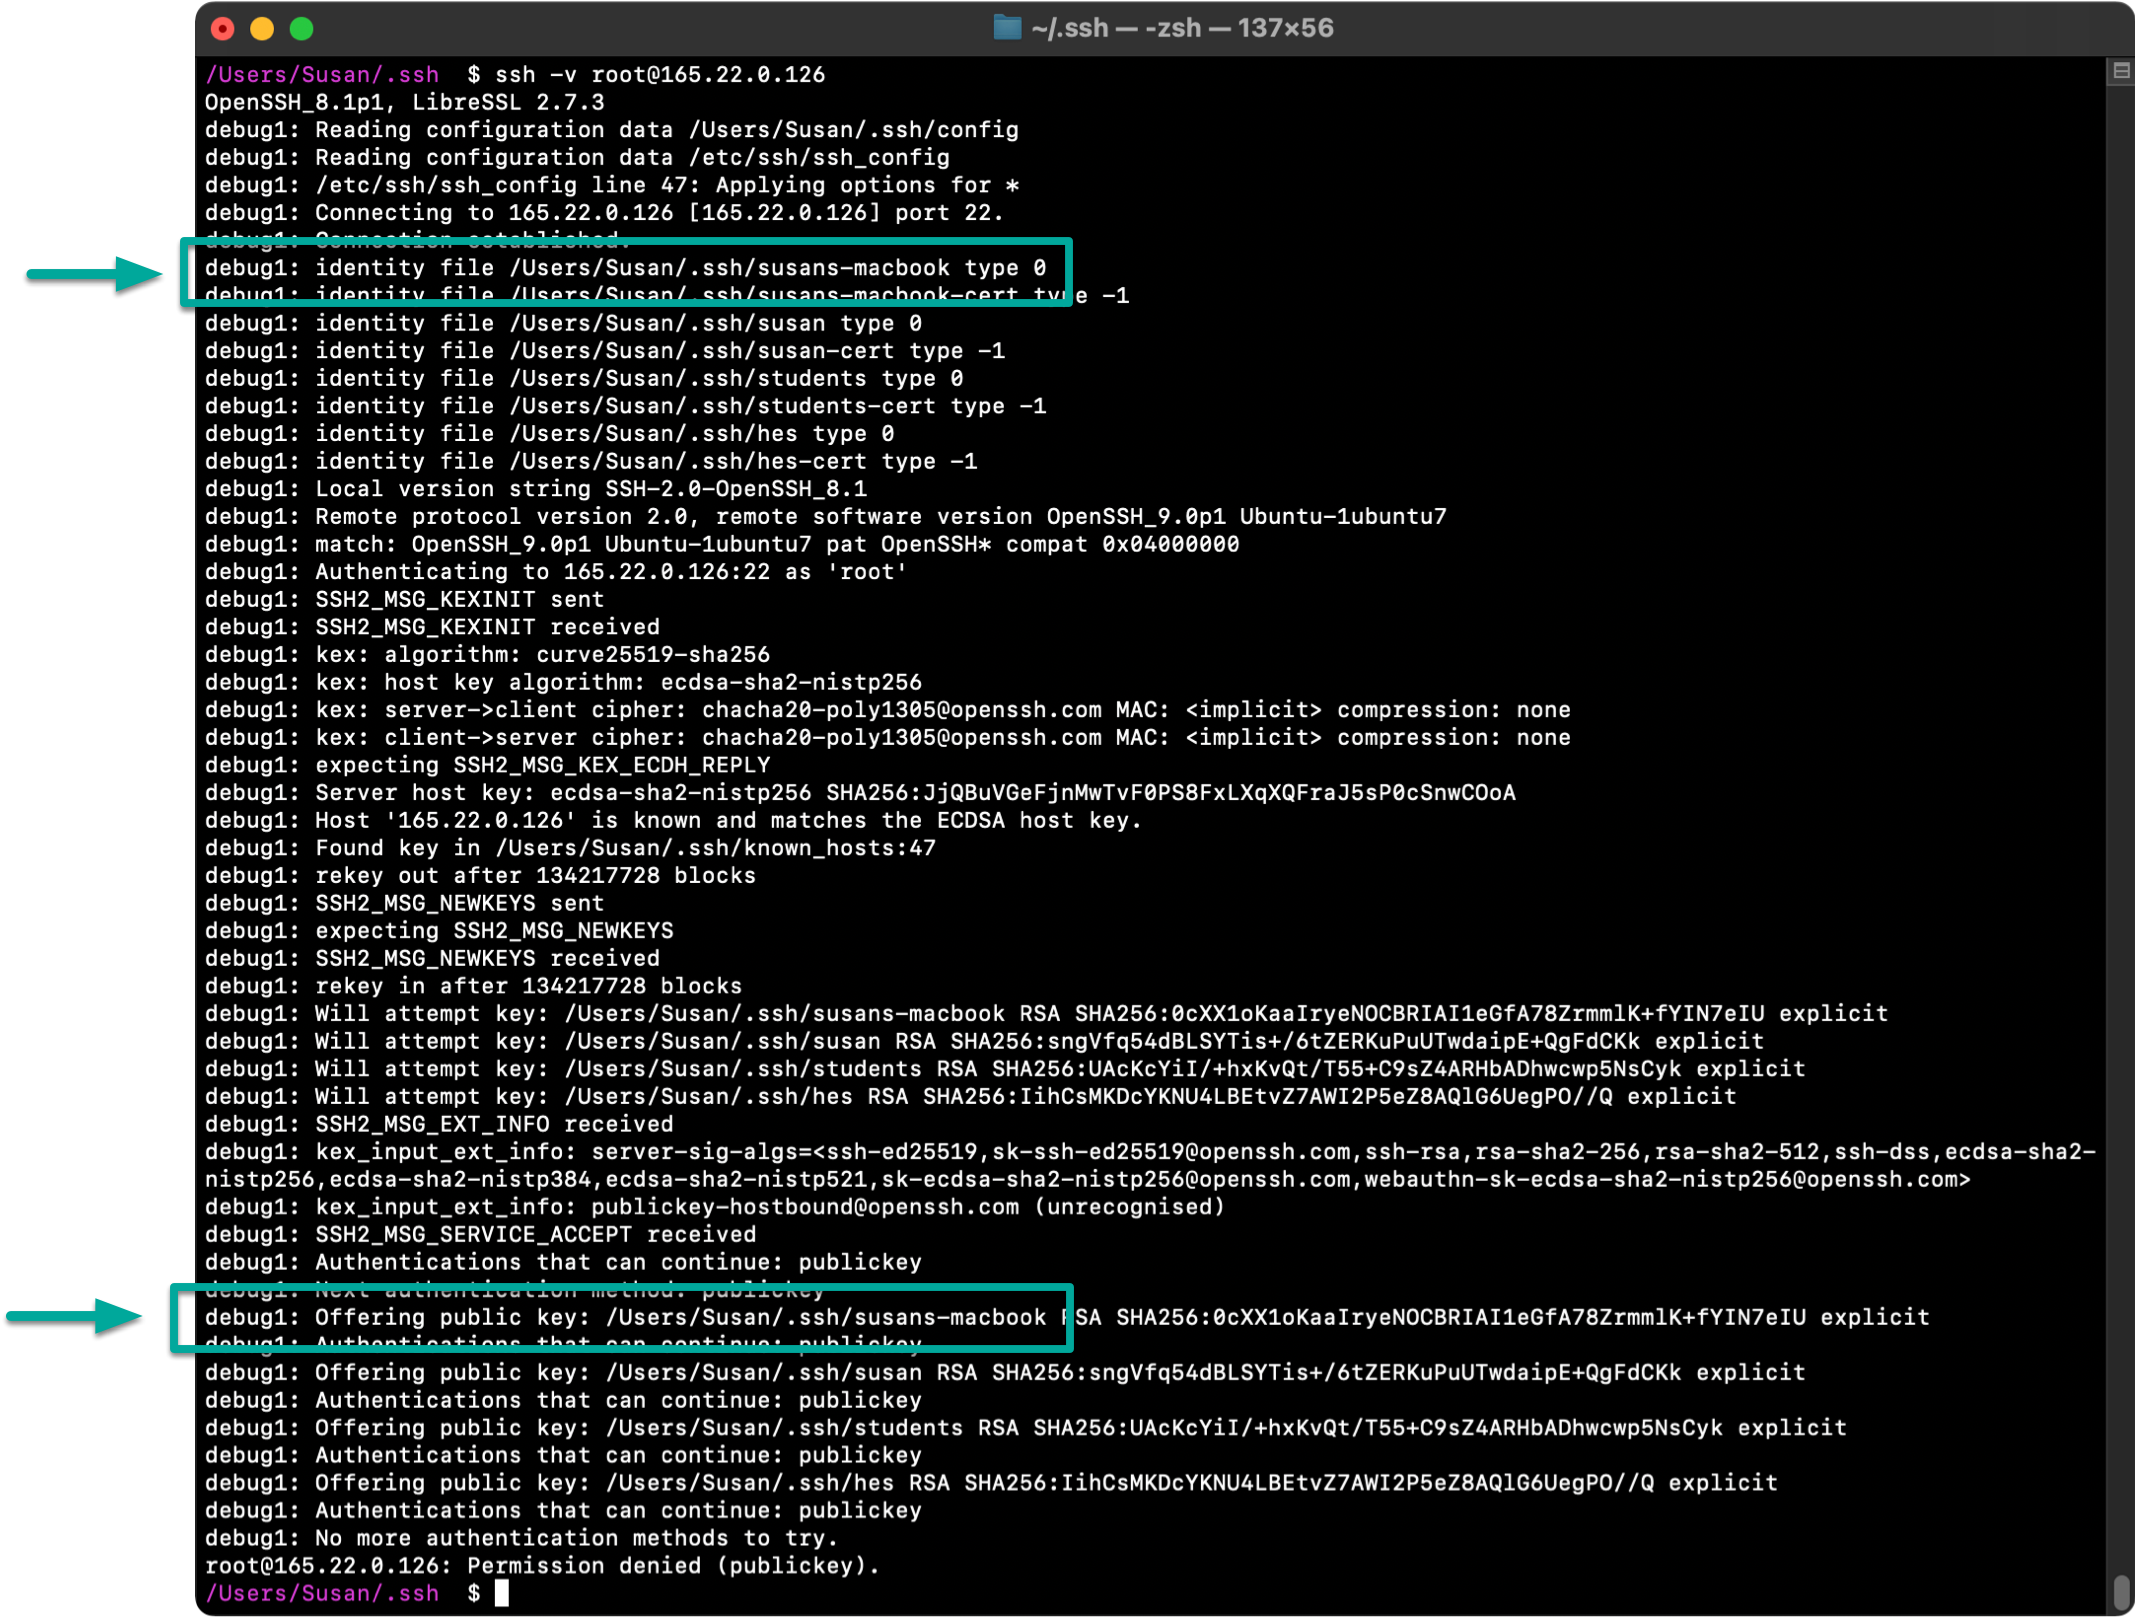
If you’ve made it past the above two steps you know that everything is set up correctly on your computer so you should turn your attention to the server you’re connecting to and confirm your public key was correctly installed there.
To do this, you need to log into your server and confirm the file ~/.ssh/authorized_keys contains the contents of your public key (in my case, that’s the contents of susans-macbook.pub).

There are a few different ways you can do this:
/etc/ssh/sshd_config changing PasswordAuthentication from No to Yes.No (off) as SSH keys are a more secure way of connecting to servers.After completing the above steps, you should be able to SSH into your server successfully. If the connection is still failing, re-examine the output of ssh -v username@ip-address for any additional clues.
No subscriptions, no auto-renewals.
Just a simple one-time payment that helps support my free, to-the-point videos without sponsered ads.
Unlocking gets you access to the notes for this video plus all 200+ guides on this site.
Your support is appreciated. Thank you!
 VSCode Remote SSH Keeps disconnecting FIXED
 SSH Remote development with VSCode
 How to fix SSH WARNING: REMOTE HOST IDENTIFICATION HAS CHANGED!